> ## Documentation Index
> Fetch the complete documentation index at: https://docs.zencoder.ai/llms.txt
> Use this file to discover all available pages before exploring further.
# Google Workspace
> Connect Zenflow to Google Suite (Gmail, Calendar, Google Drive) to read, draft, and send emails autonomously; read events, check availability, and create invites; search, read, create, and organize documents.
This native integration requires a Zencoder account and is currently in **Beta**.
## Overview
The Google suite integrations let the AI agent interact with your:
* email directly. Search threads, read messages, draft replies, and send emails — all from within a Zenflow task.
* calendar. It can check schedules, find availability, create events, and set reminders — enabling automated meeting prep, scheduling workflows, and time-based task triggers.
* files and documents. Search across Drive, read and create Google Docs, Sheets, and Slides, organize folders, and generate reports, proposals, and summaries.
## Permissions
Gmail supports two permission levels:
| Permission | What the agent can do |
| ---------------- | ------------------------------------------------------------------------------------- |
| **Read only** | Search inbox, read email threads, extract information from messages and attachments |
| **Read & Write** | Everything in Read only, plus draft emails, save drafts for review, and send messages |
Google Calendar supports two permission levels:
| Permission | What the agent can do |
| ---------------- | ------------------------------------------------------------------------------------------------- |
| **Read only** | Read events, check availability |
| **Read & Write** | Everything in Read only, plus create calendar invites, set reminders, and manage recurring events |
Google Drive currently supports **Read & Write** only.
## Connecting to Google Workspace
### Step 1: Set Up Google Cloud OAuth (once for all integrations)
Google Workspace integrations require OAuth credentials from a Google Cloud project. Follow these steps to create them:
Go to the [Google Cloud Console](https://console.cloud.google.com/)
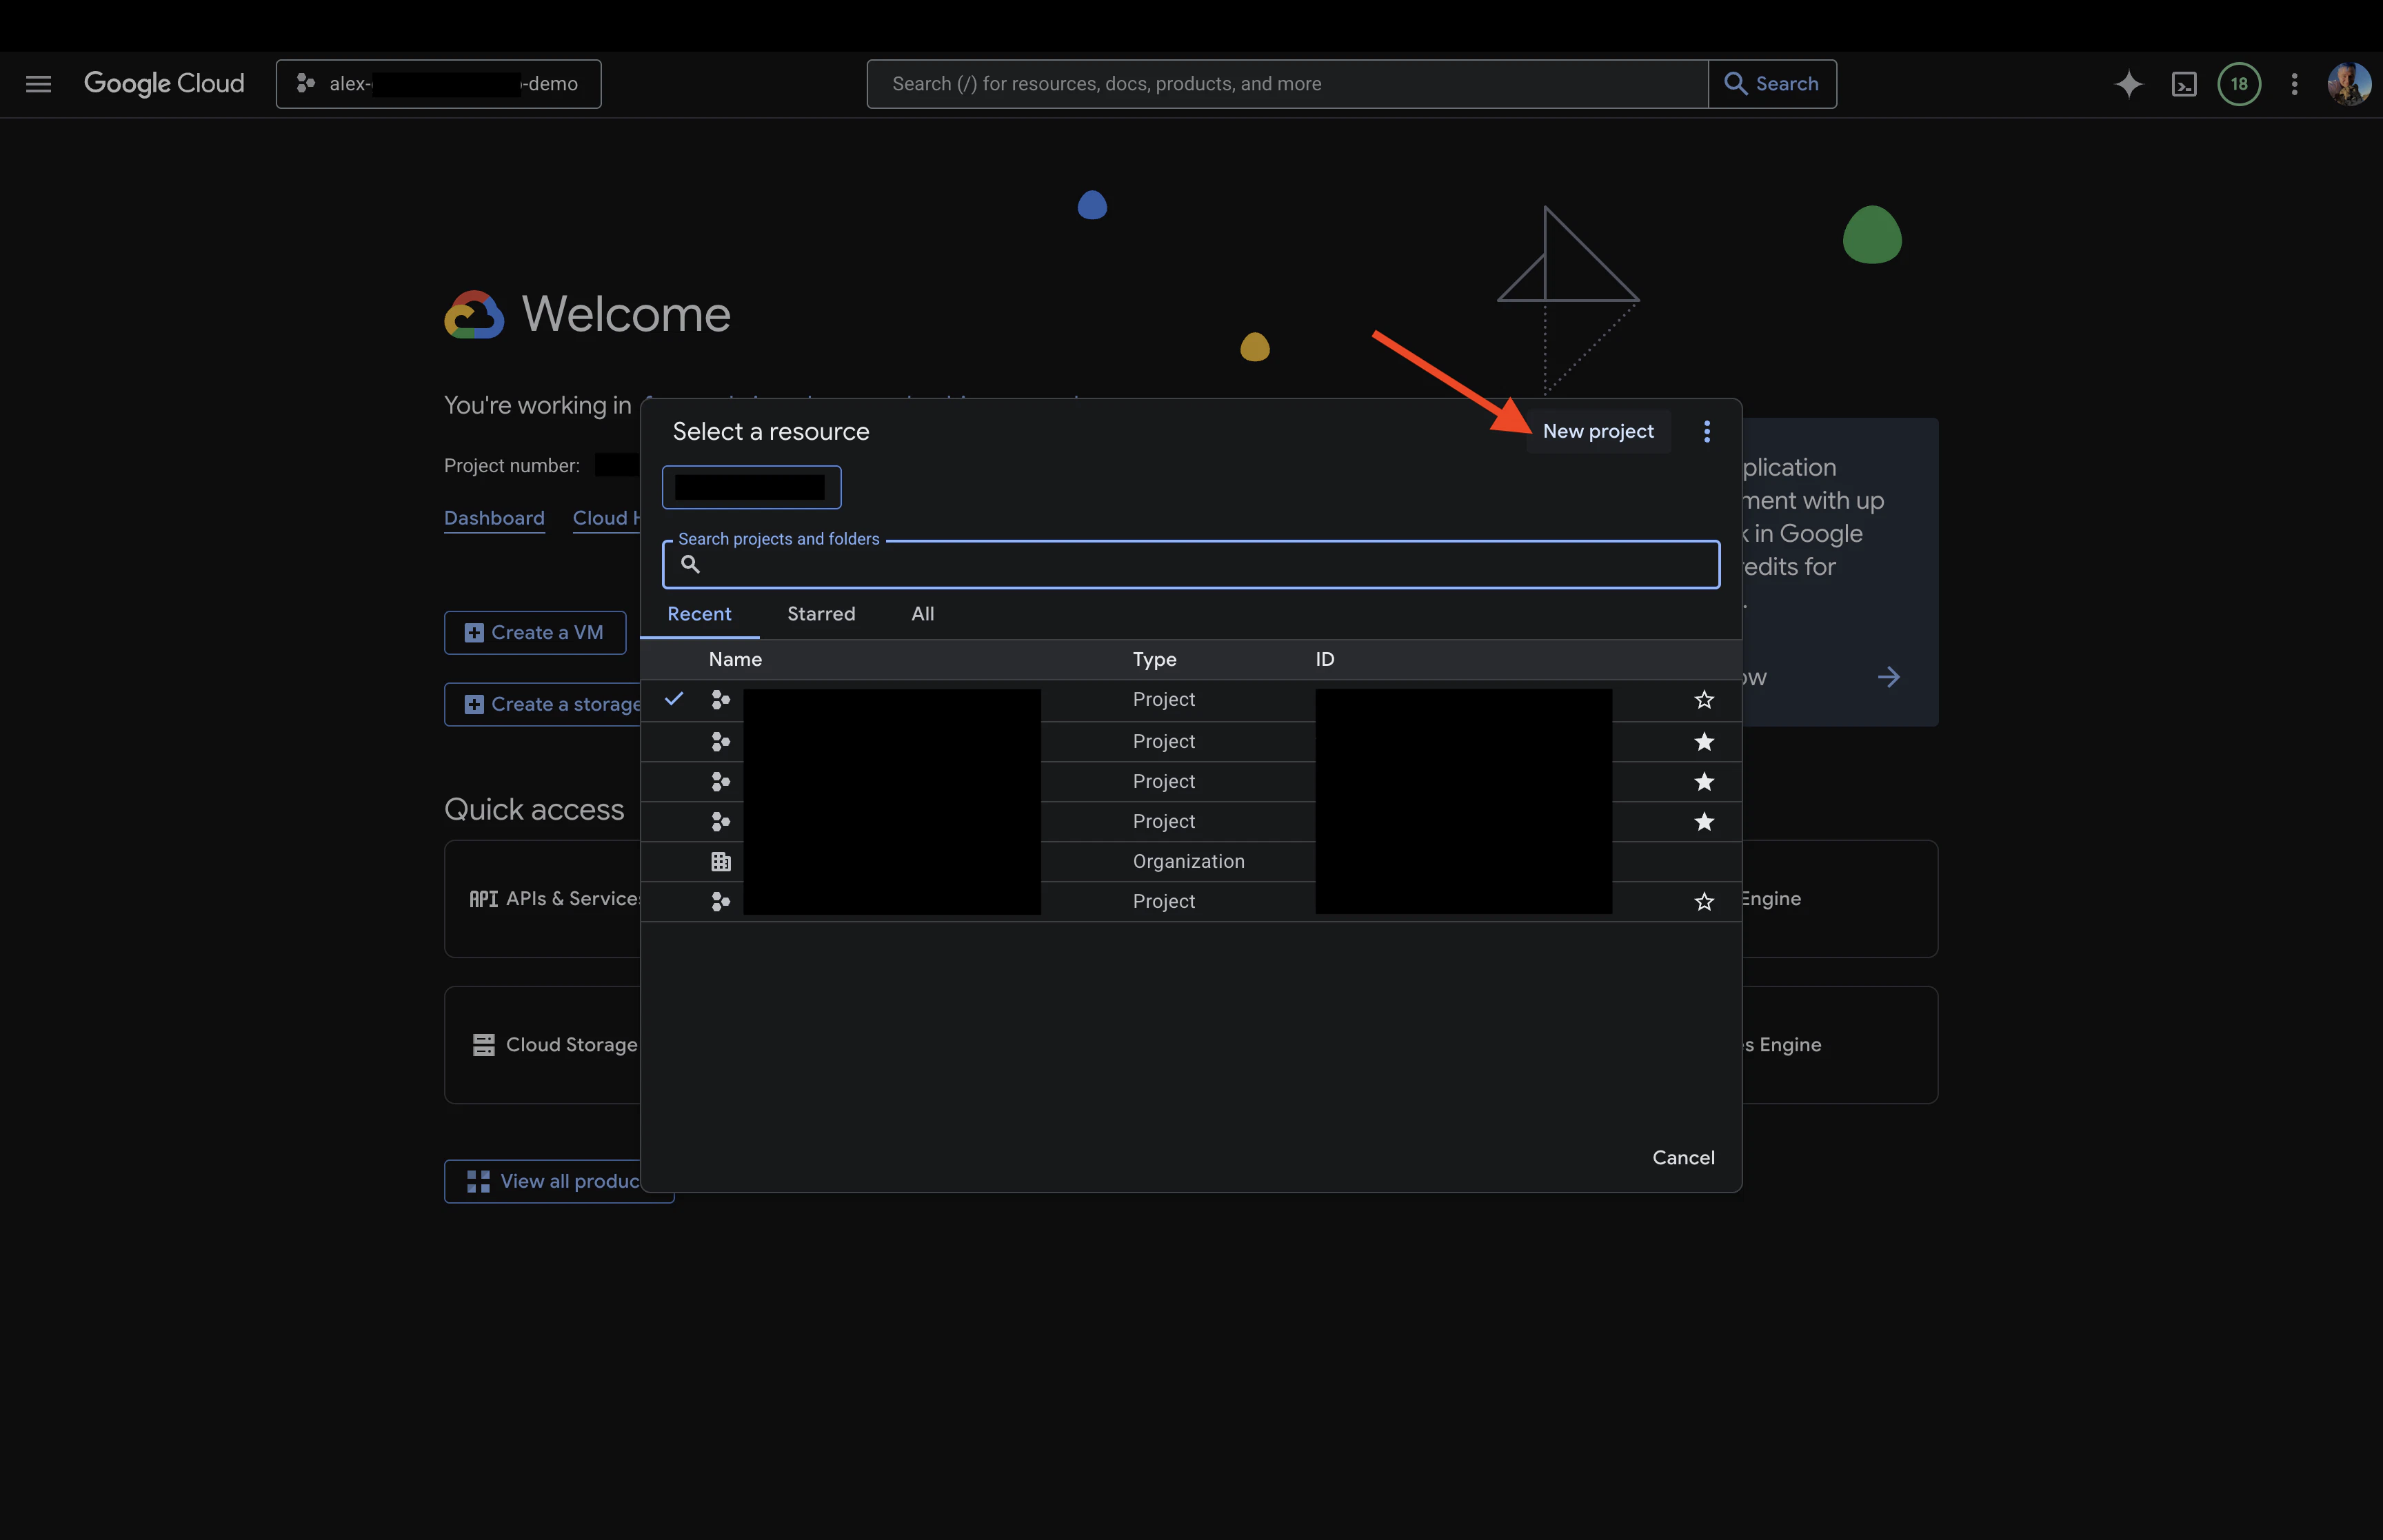
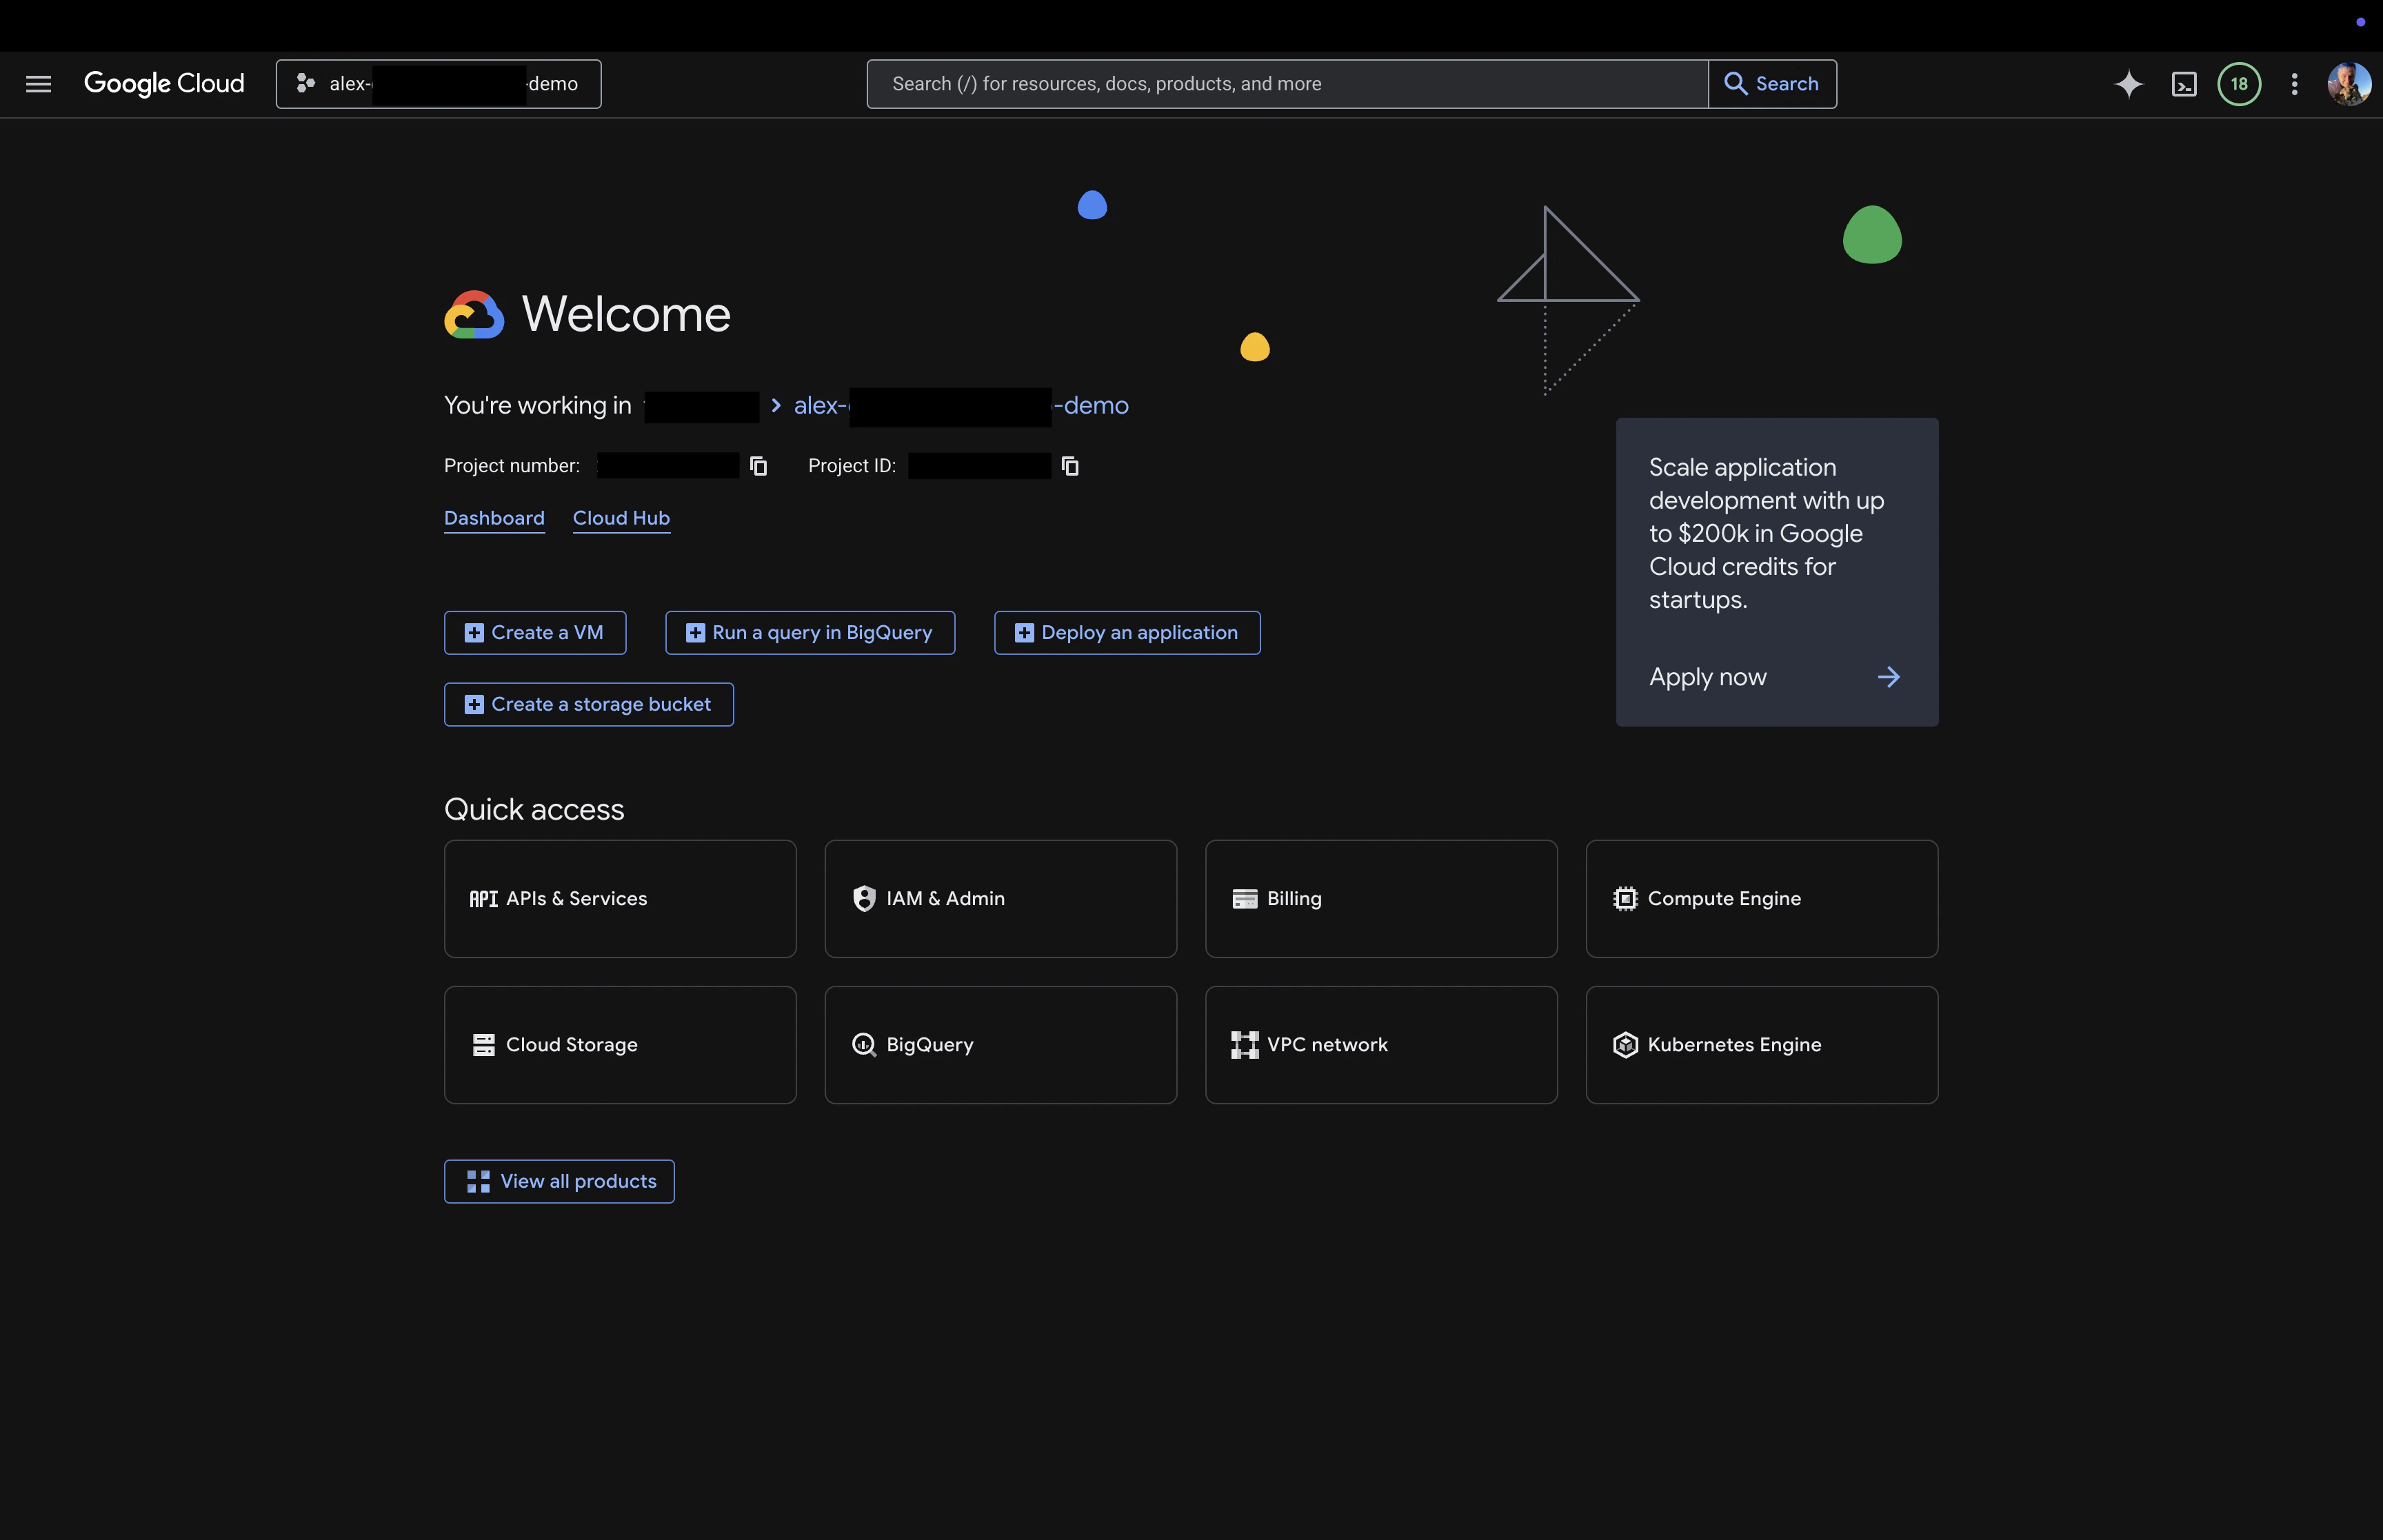 Create a new project or select an existing one
 Go to [Create OAuth consent screen](https://console.cloud.google.com/apis/credentials/consent) or search for **OAuth consent screen** in the search bar

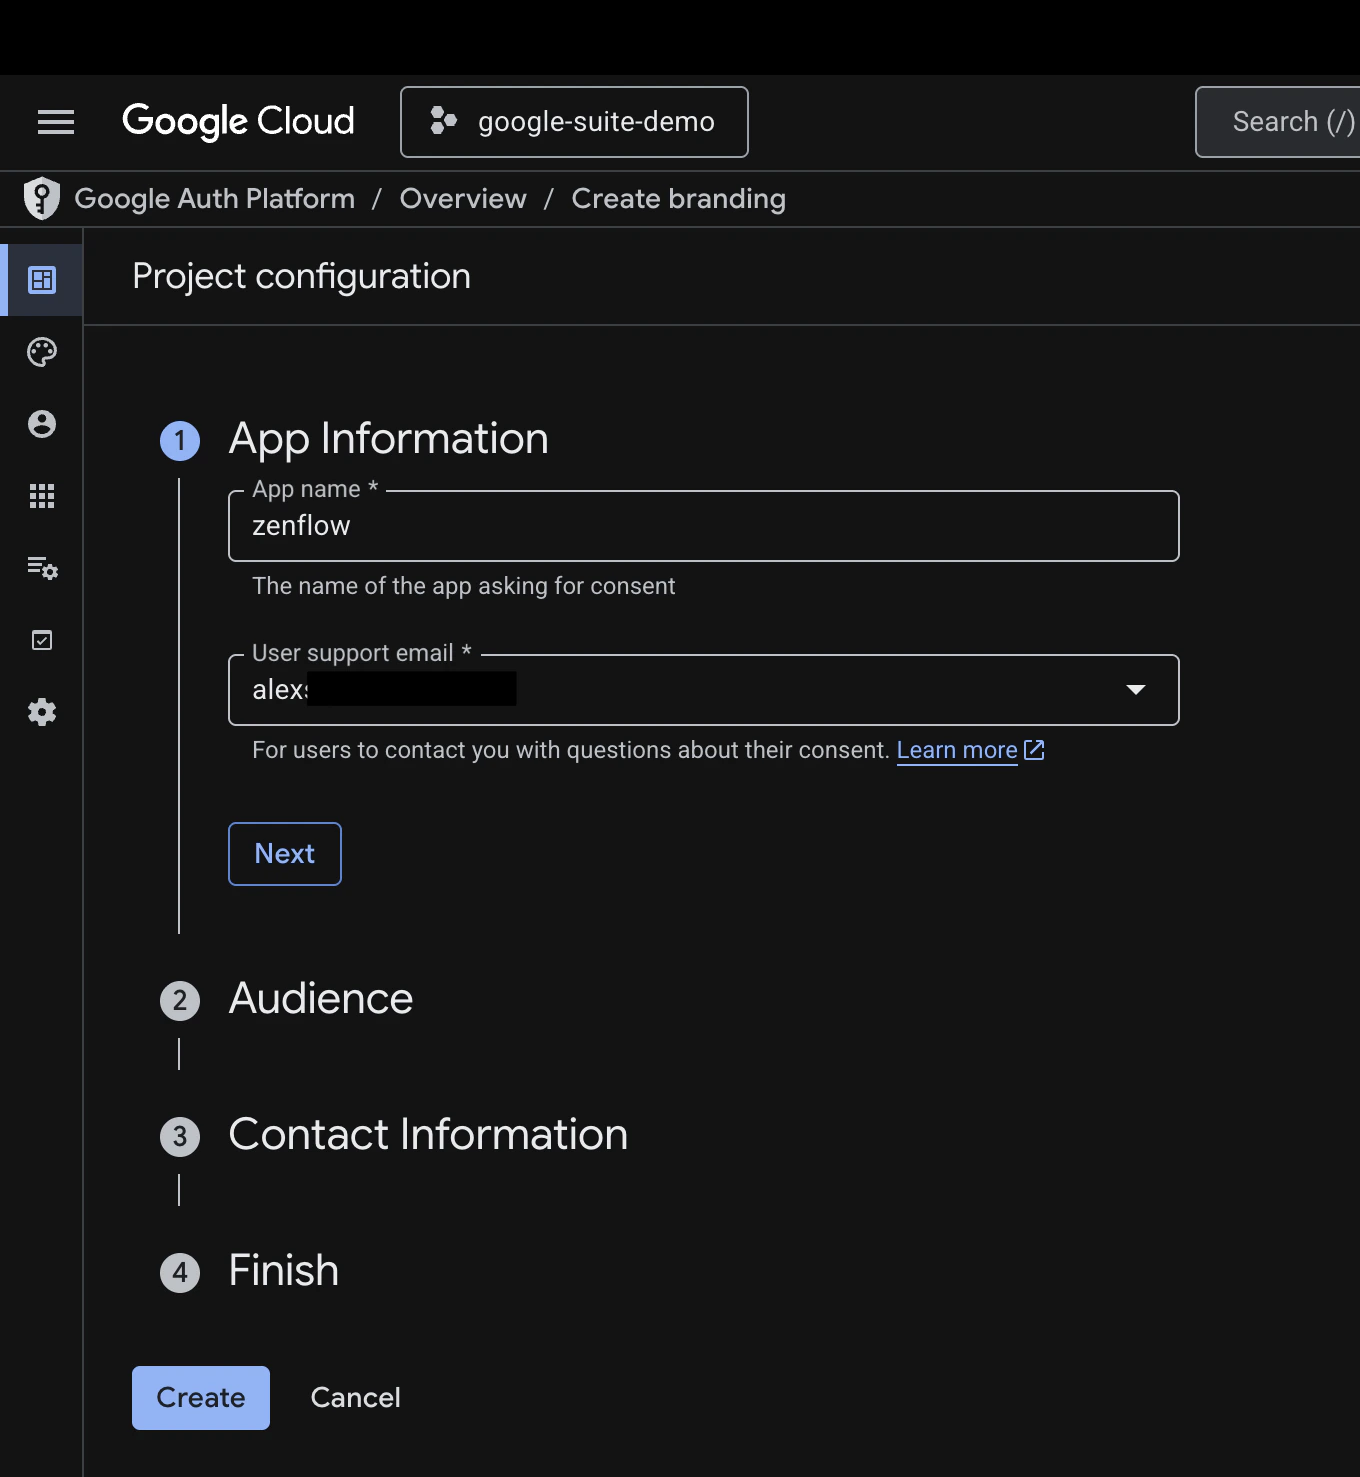
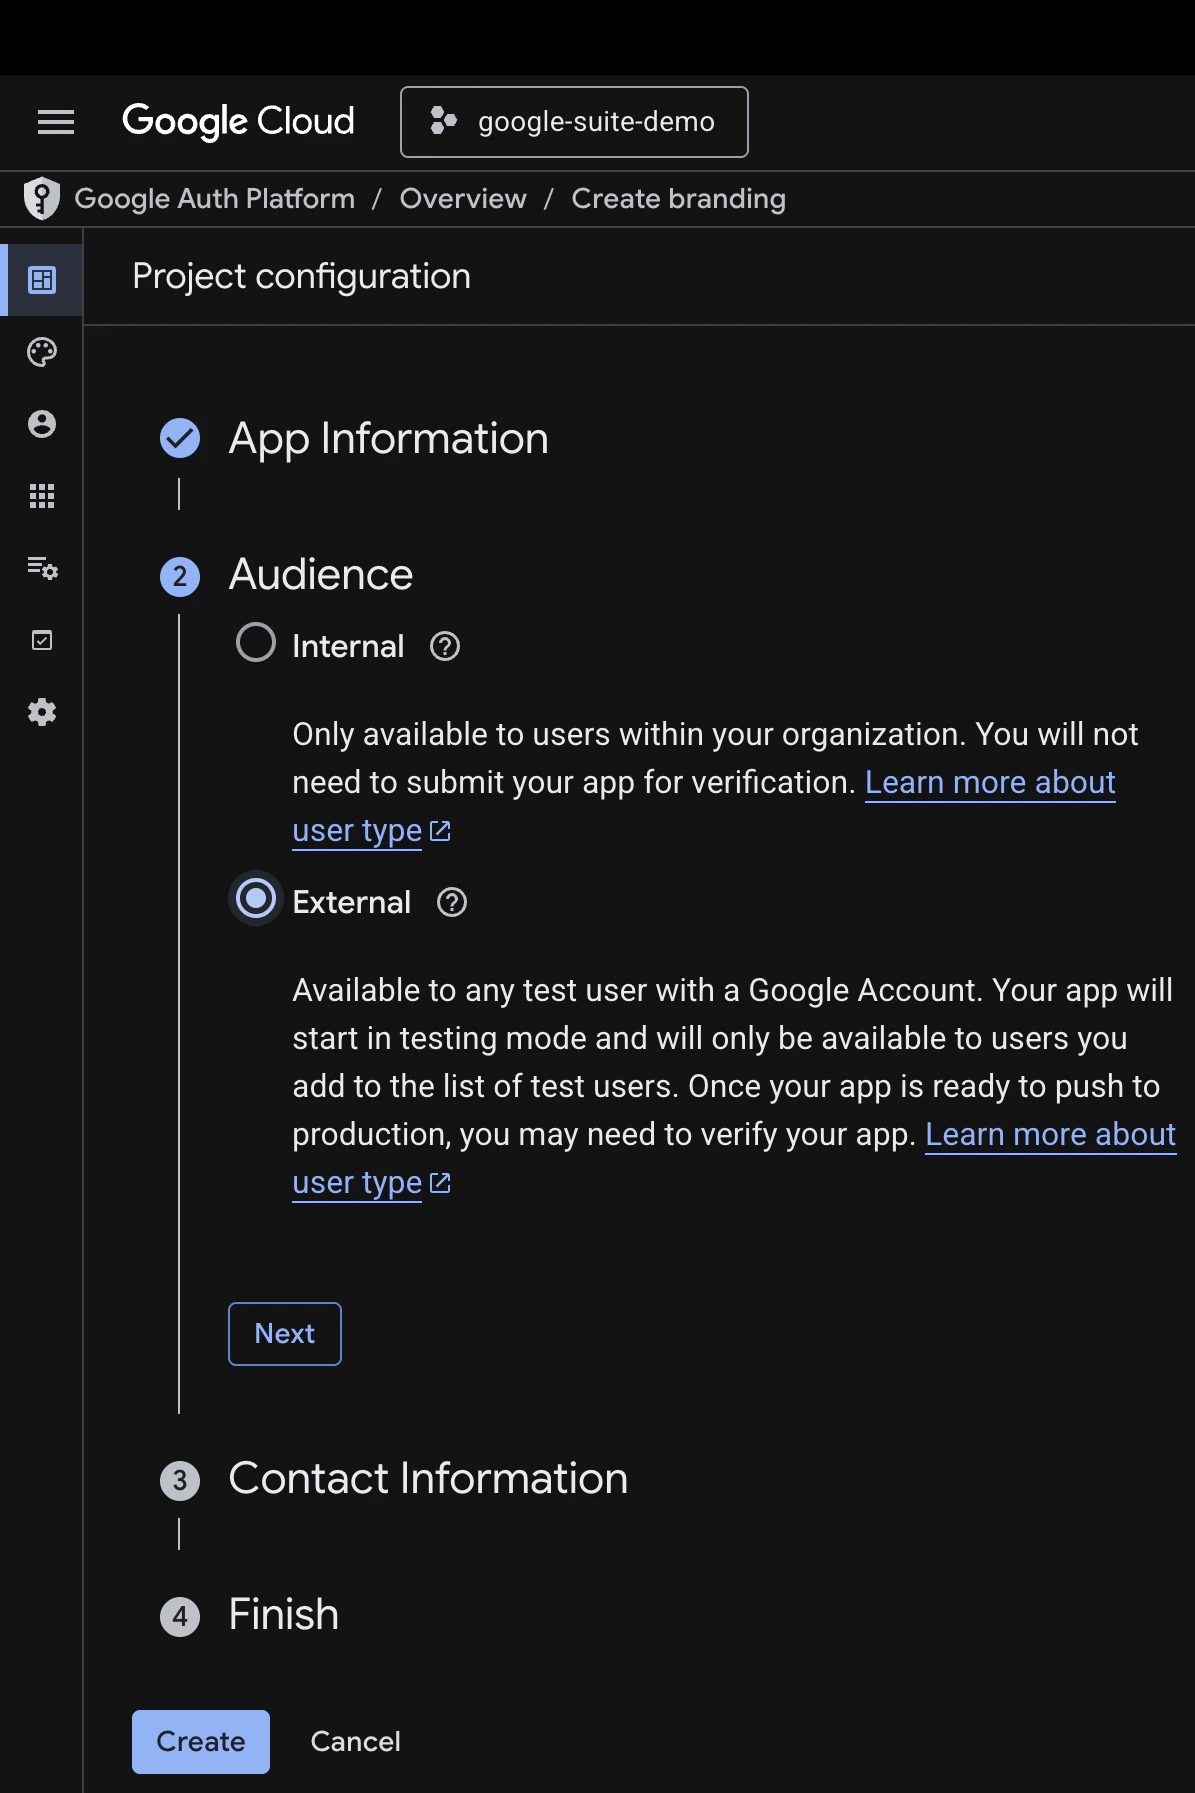
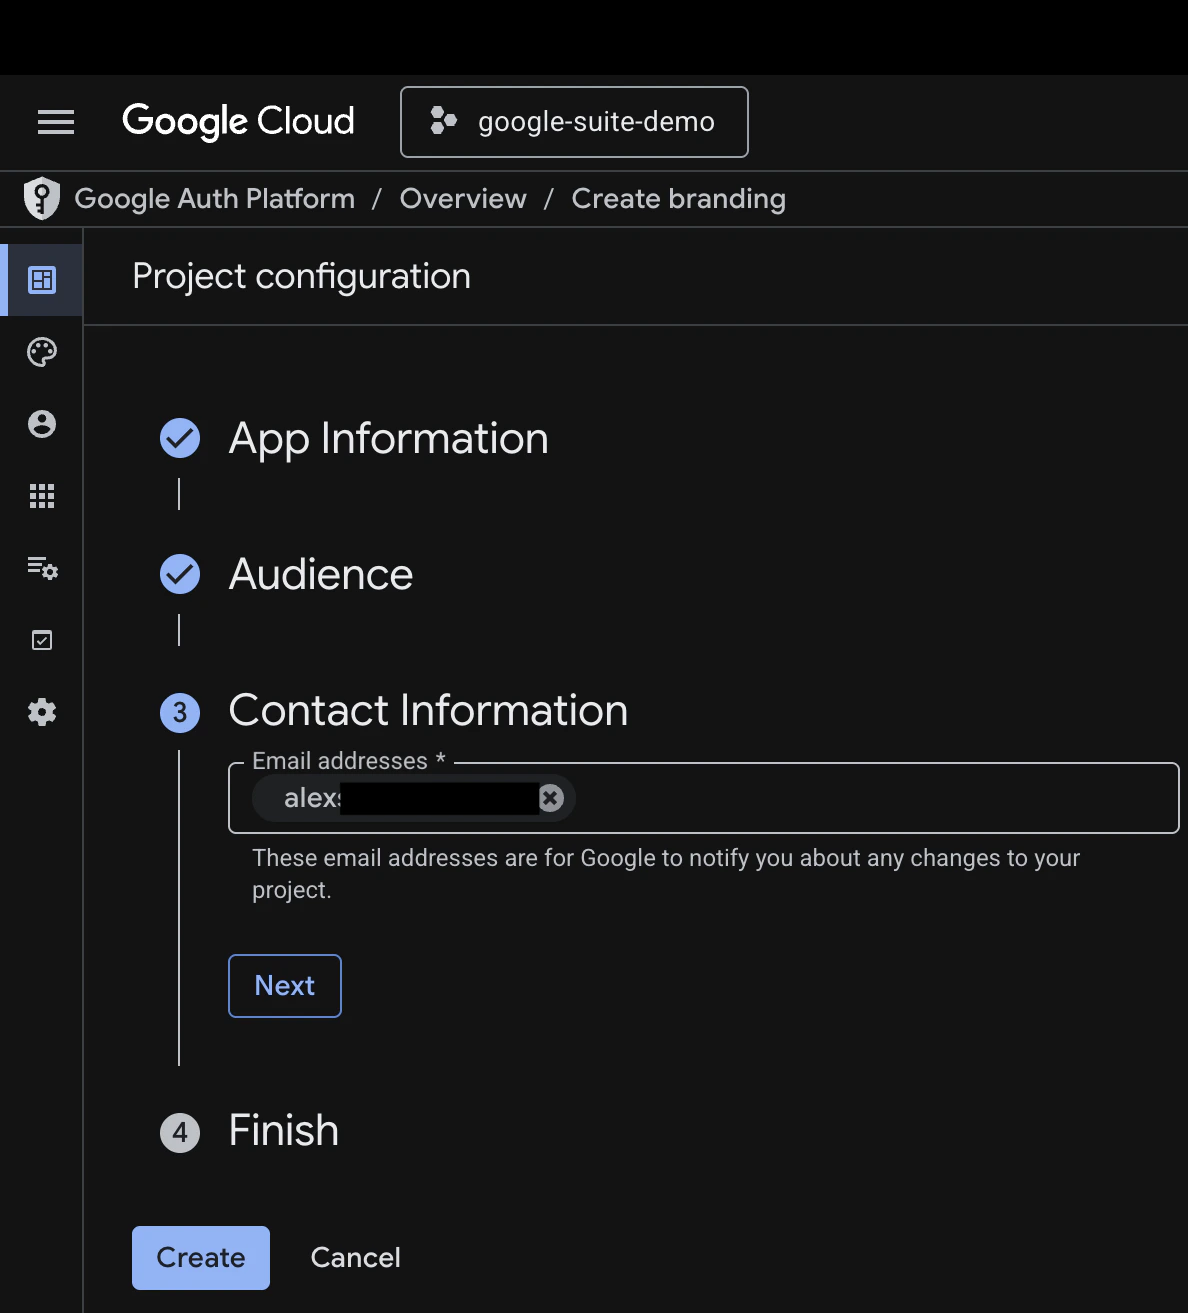
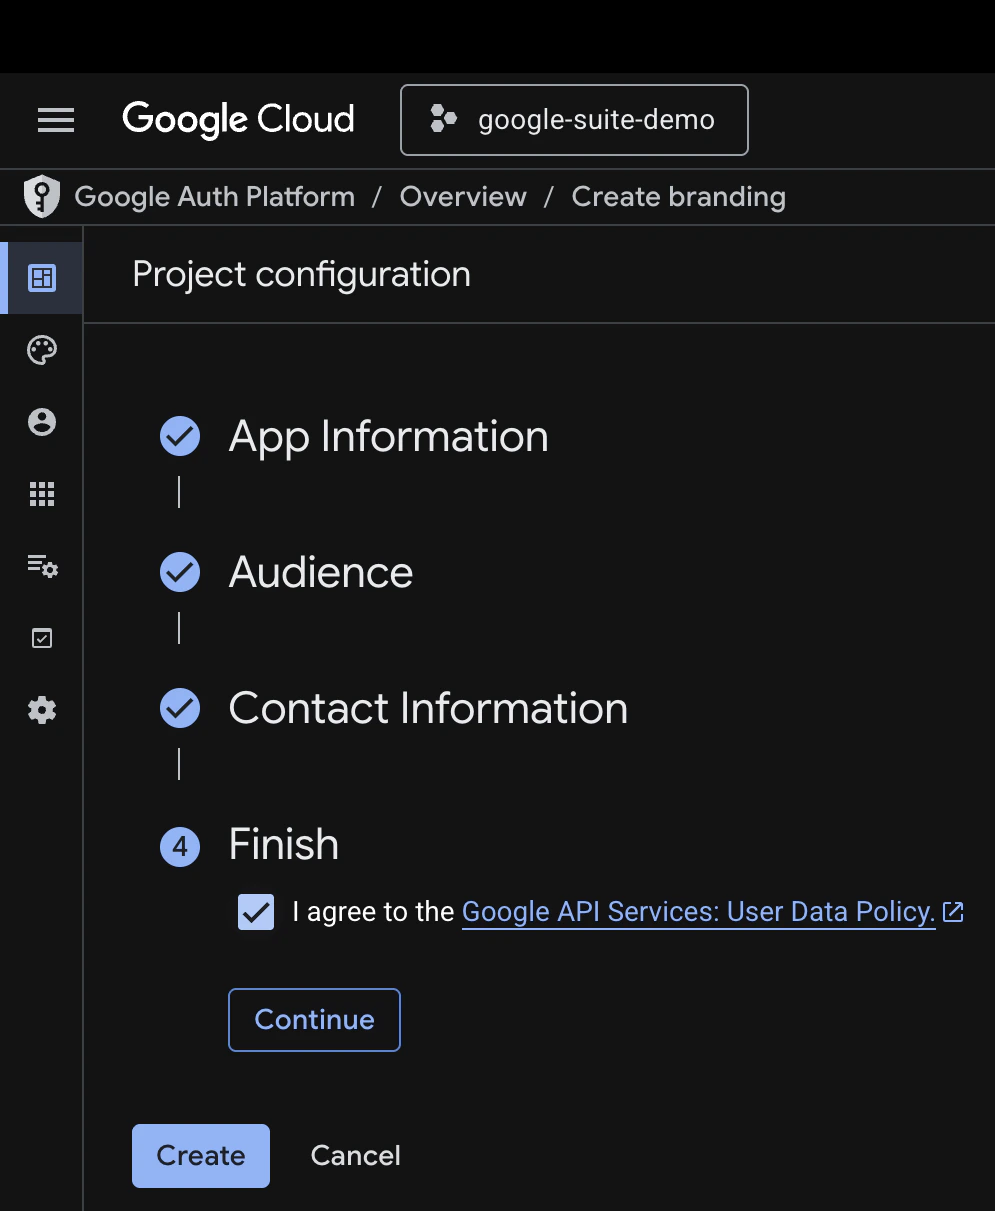
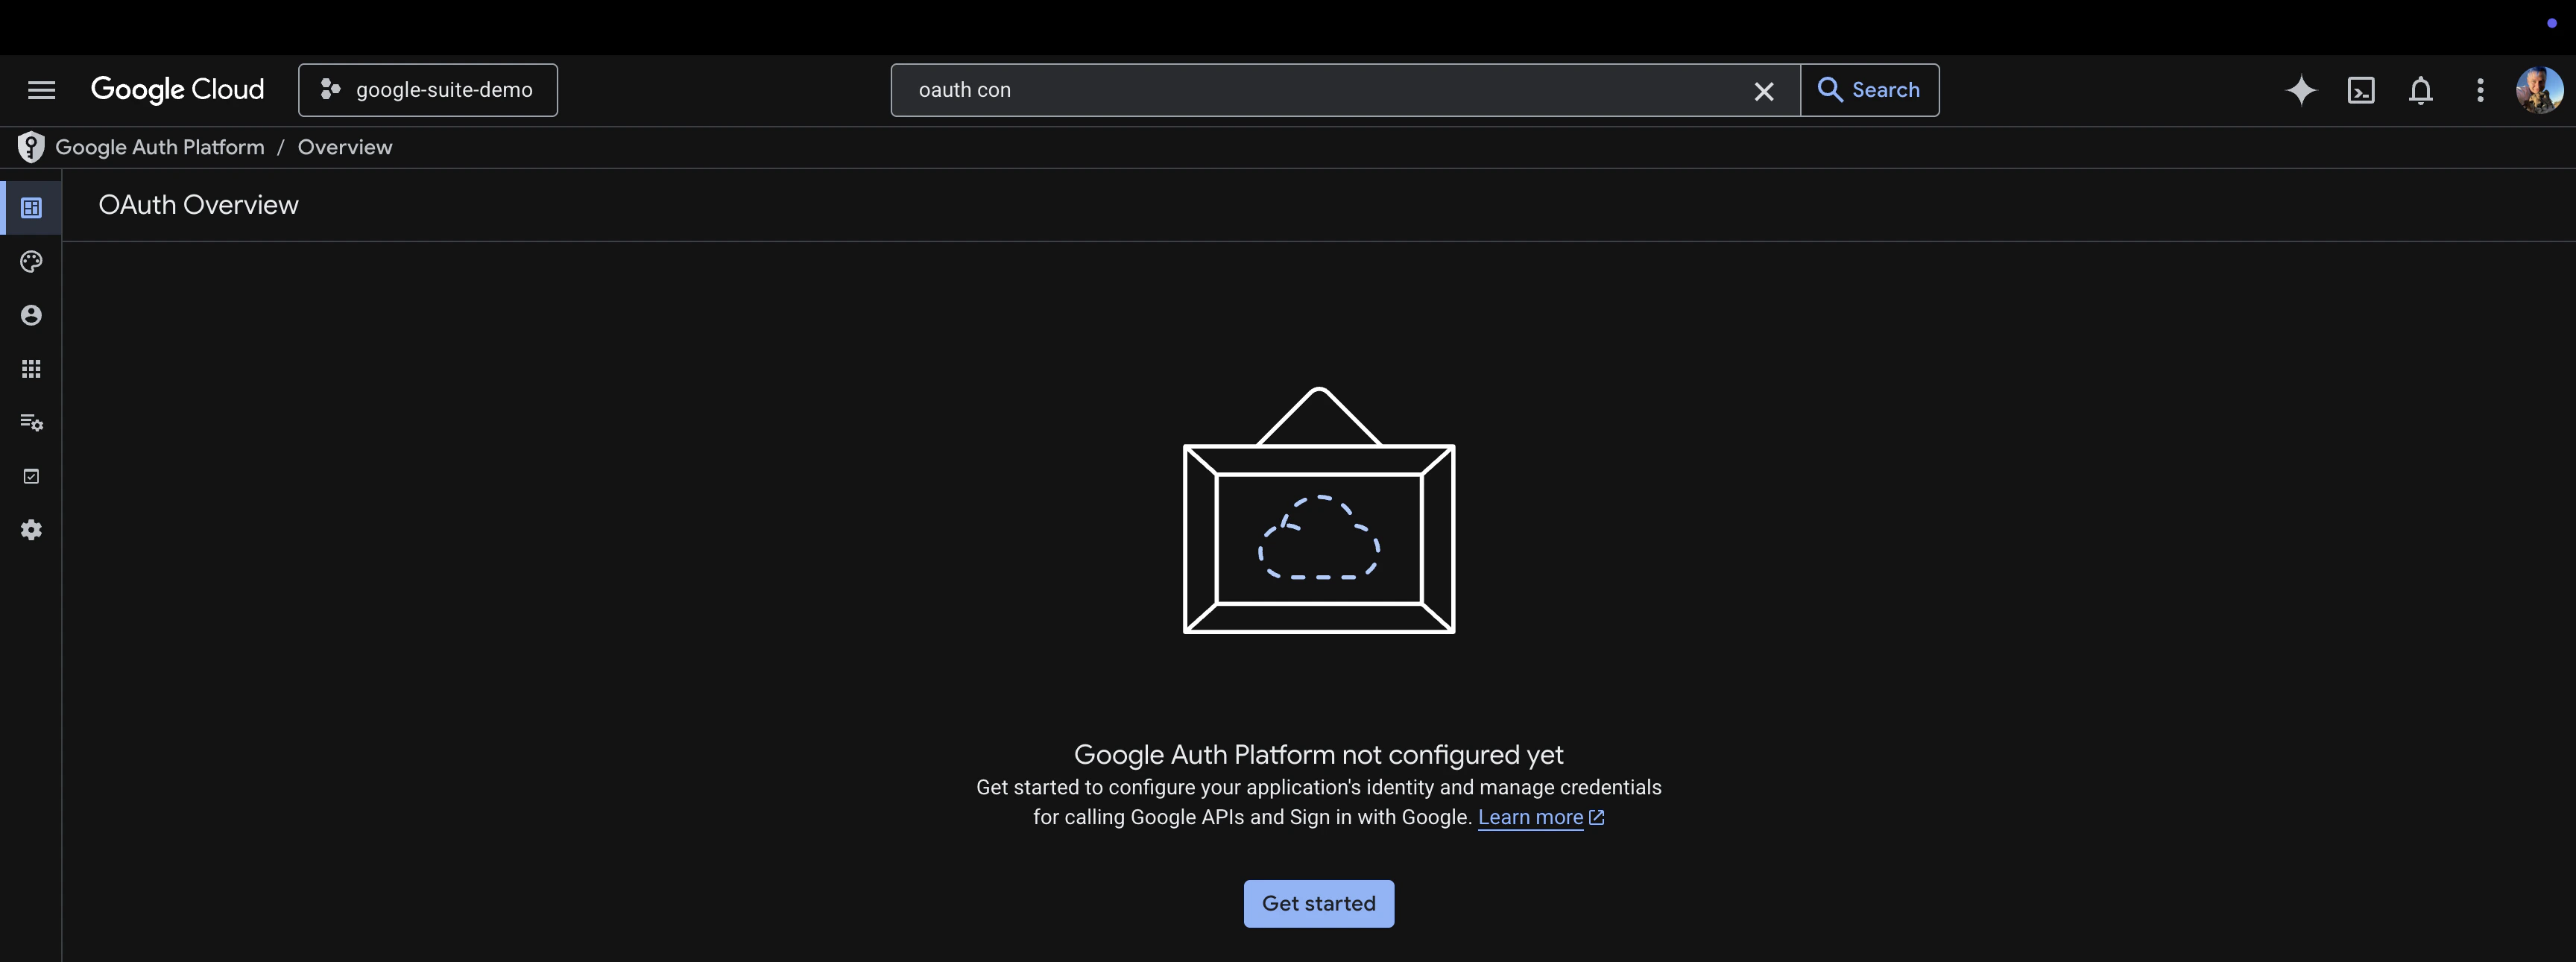 Click **Get started**, fill in the required info, make sure to put **Audience** on a second screen to external
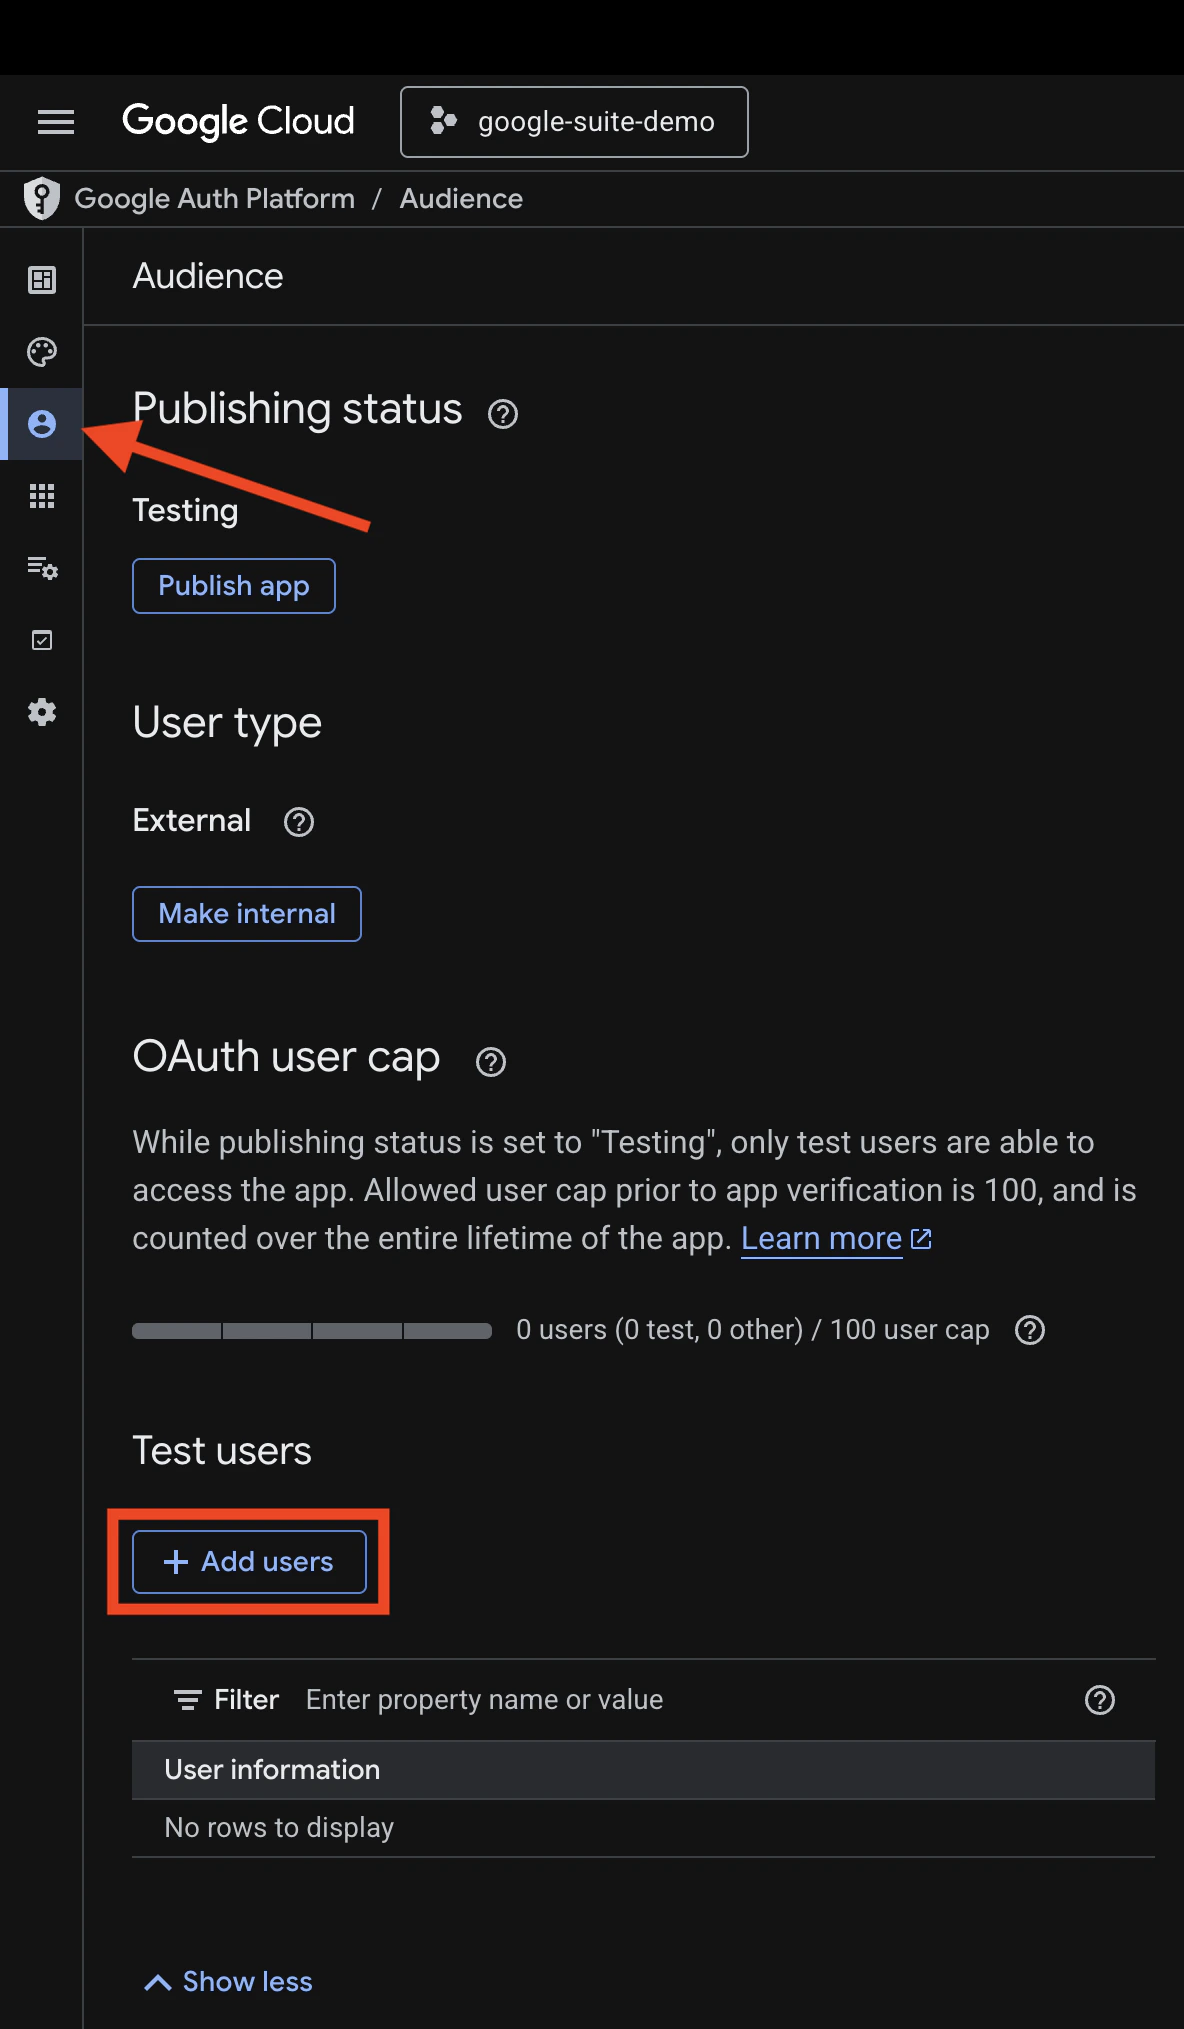
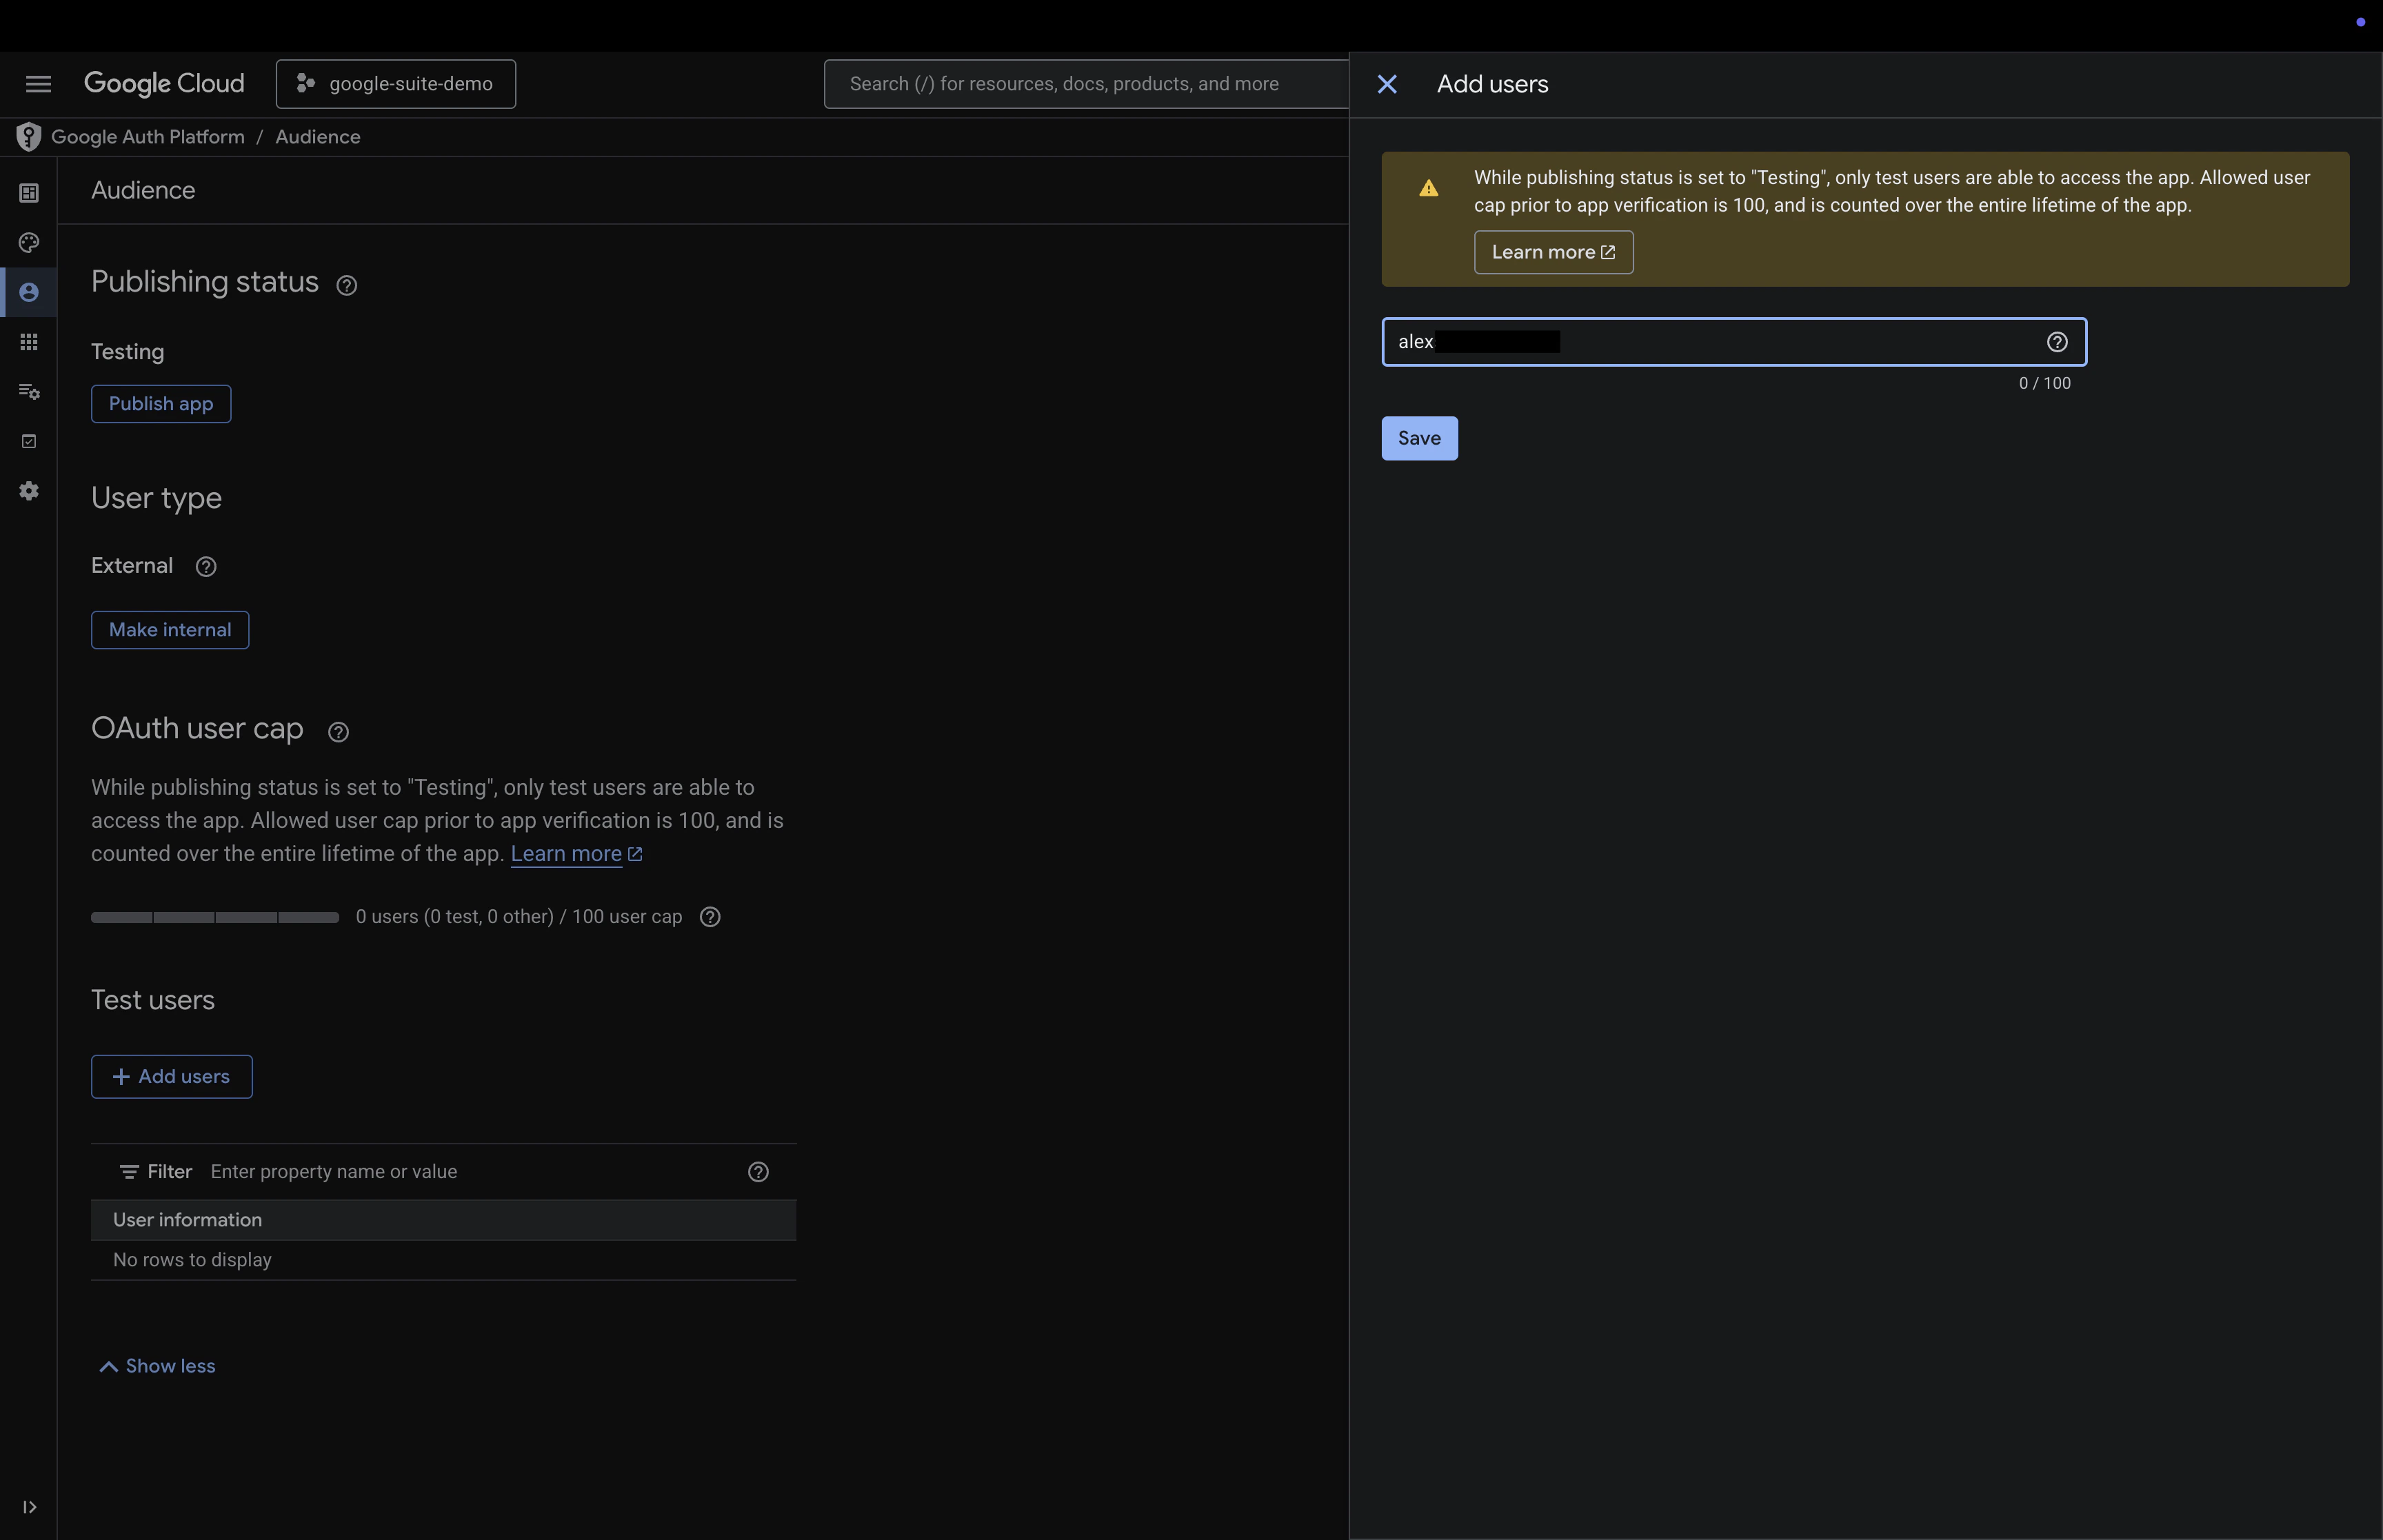
 Go to the **Audience** page and add your Google email under **Test users**.
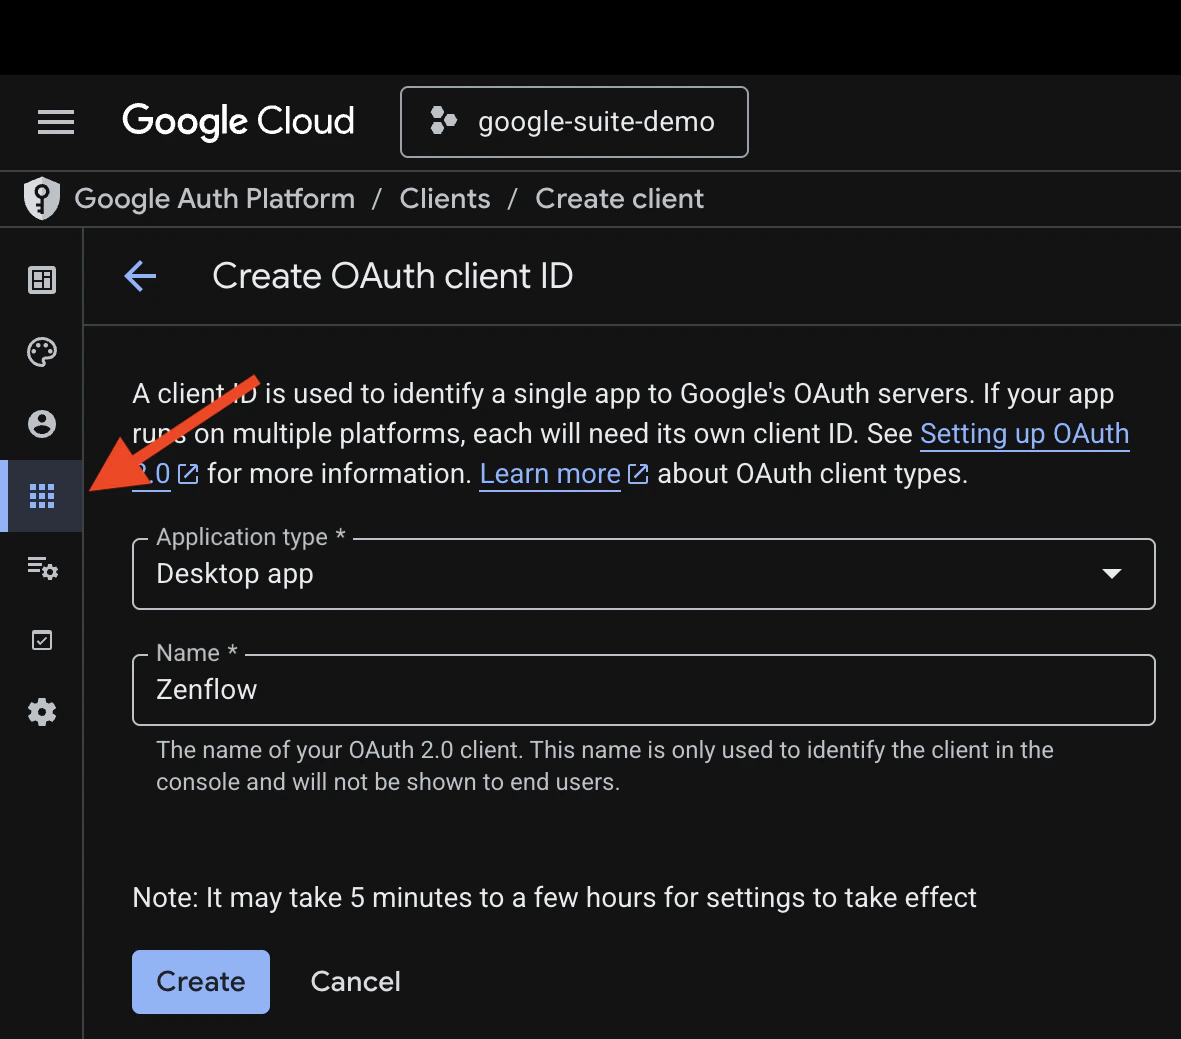
 Go to **Clients**, click **Create Client**, select **Desktop app** as the application type, give desired na,e, and click **Create**.
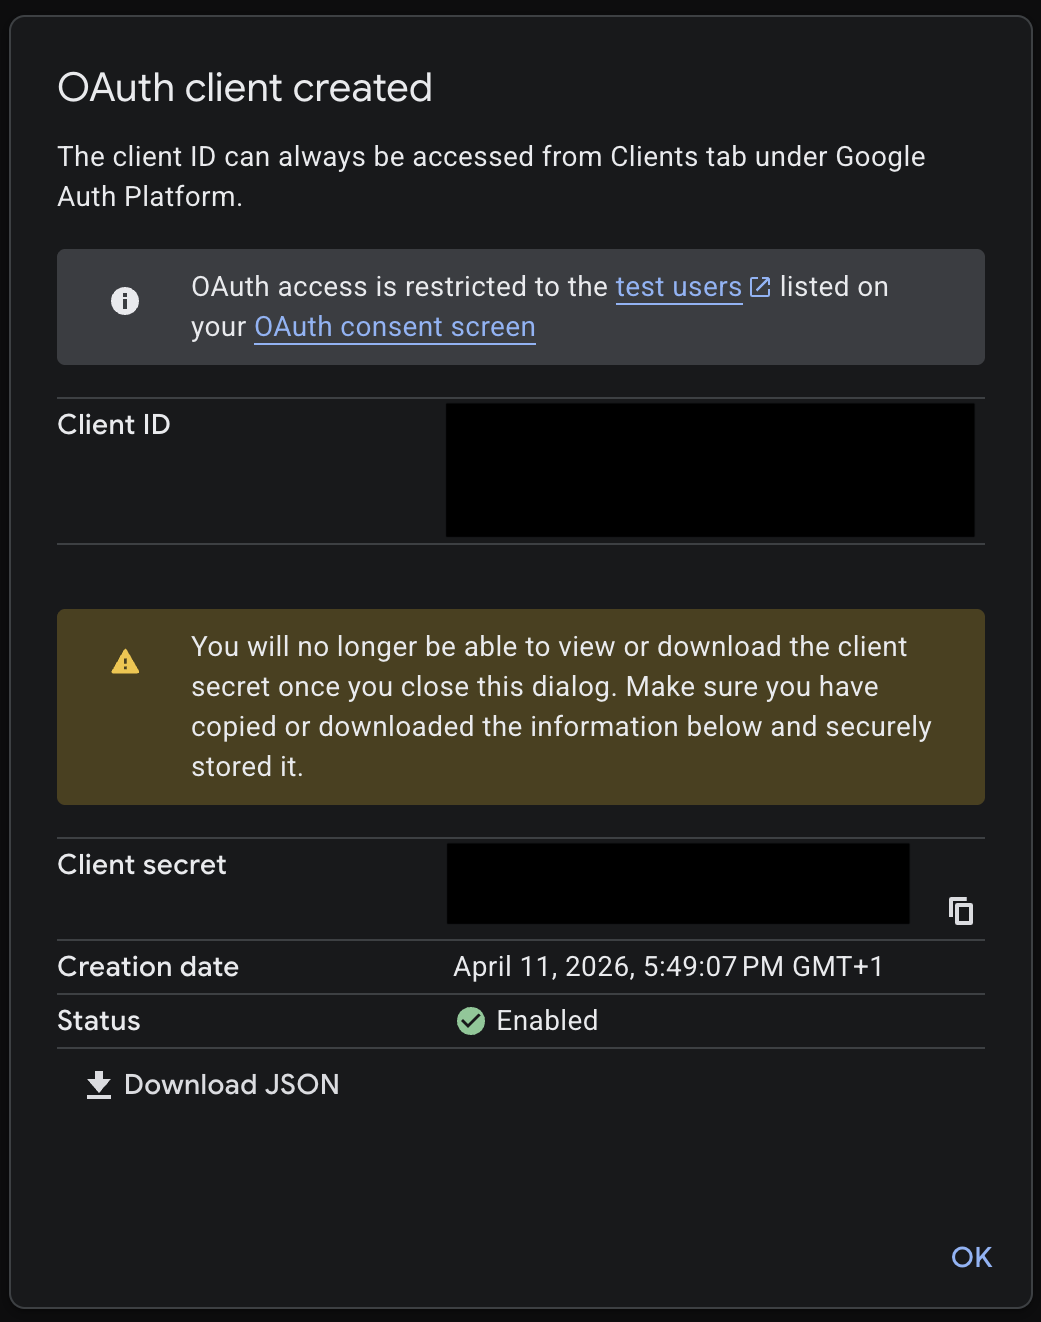
 Copy the **Client ID** and **Client Secret** from the created credential. You will need these in the next step.
 ### Step 2: Enable required APIs
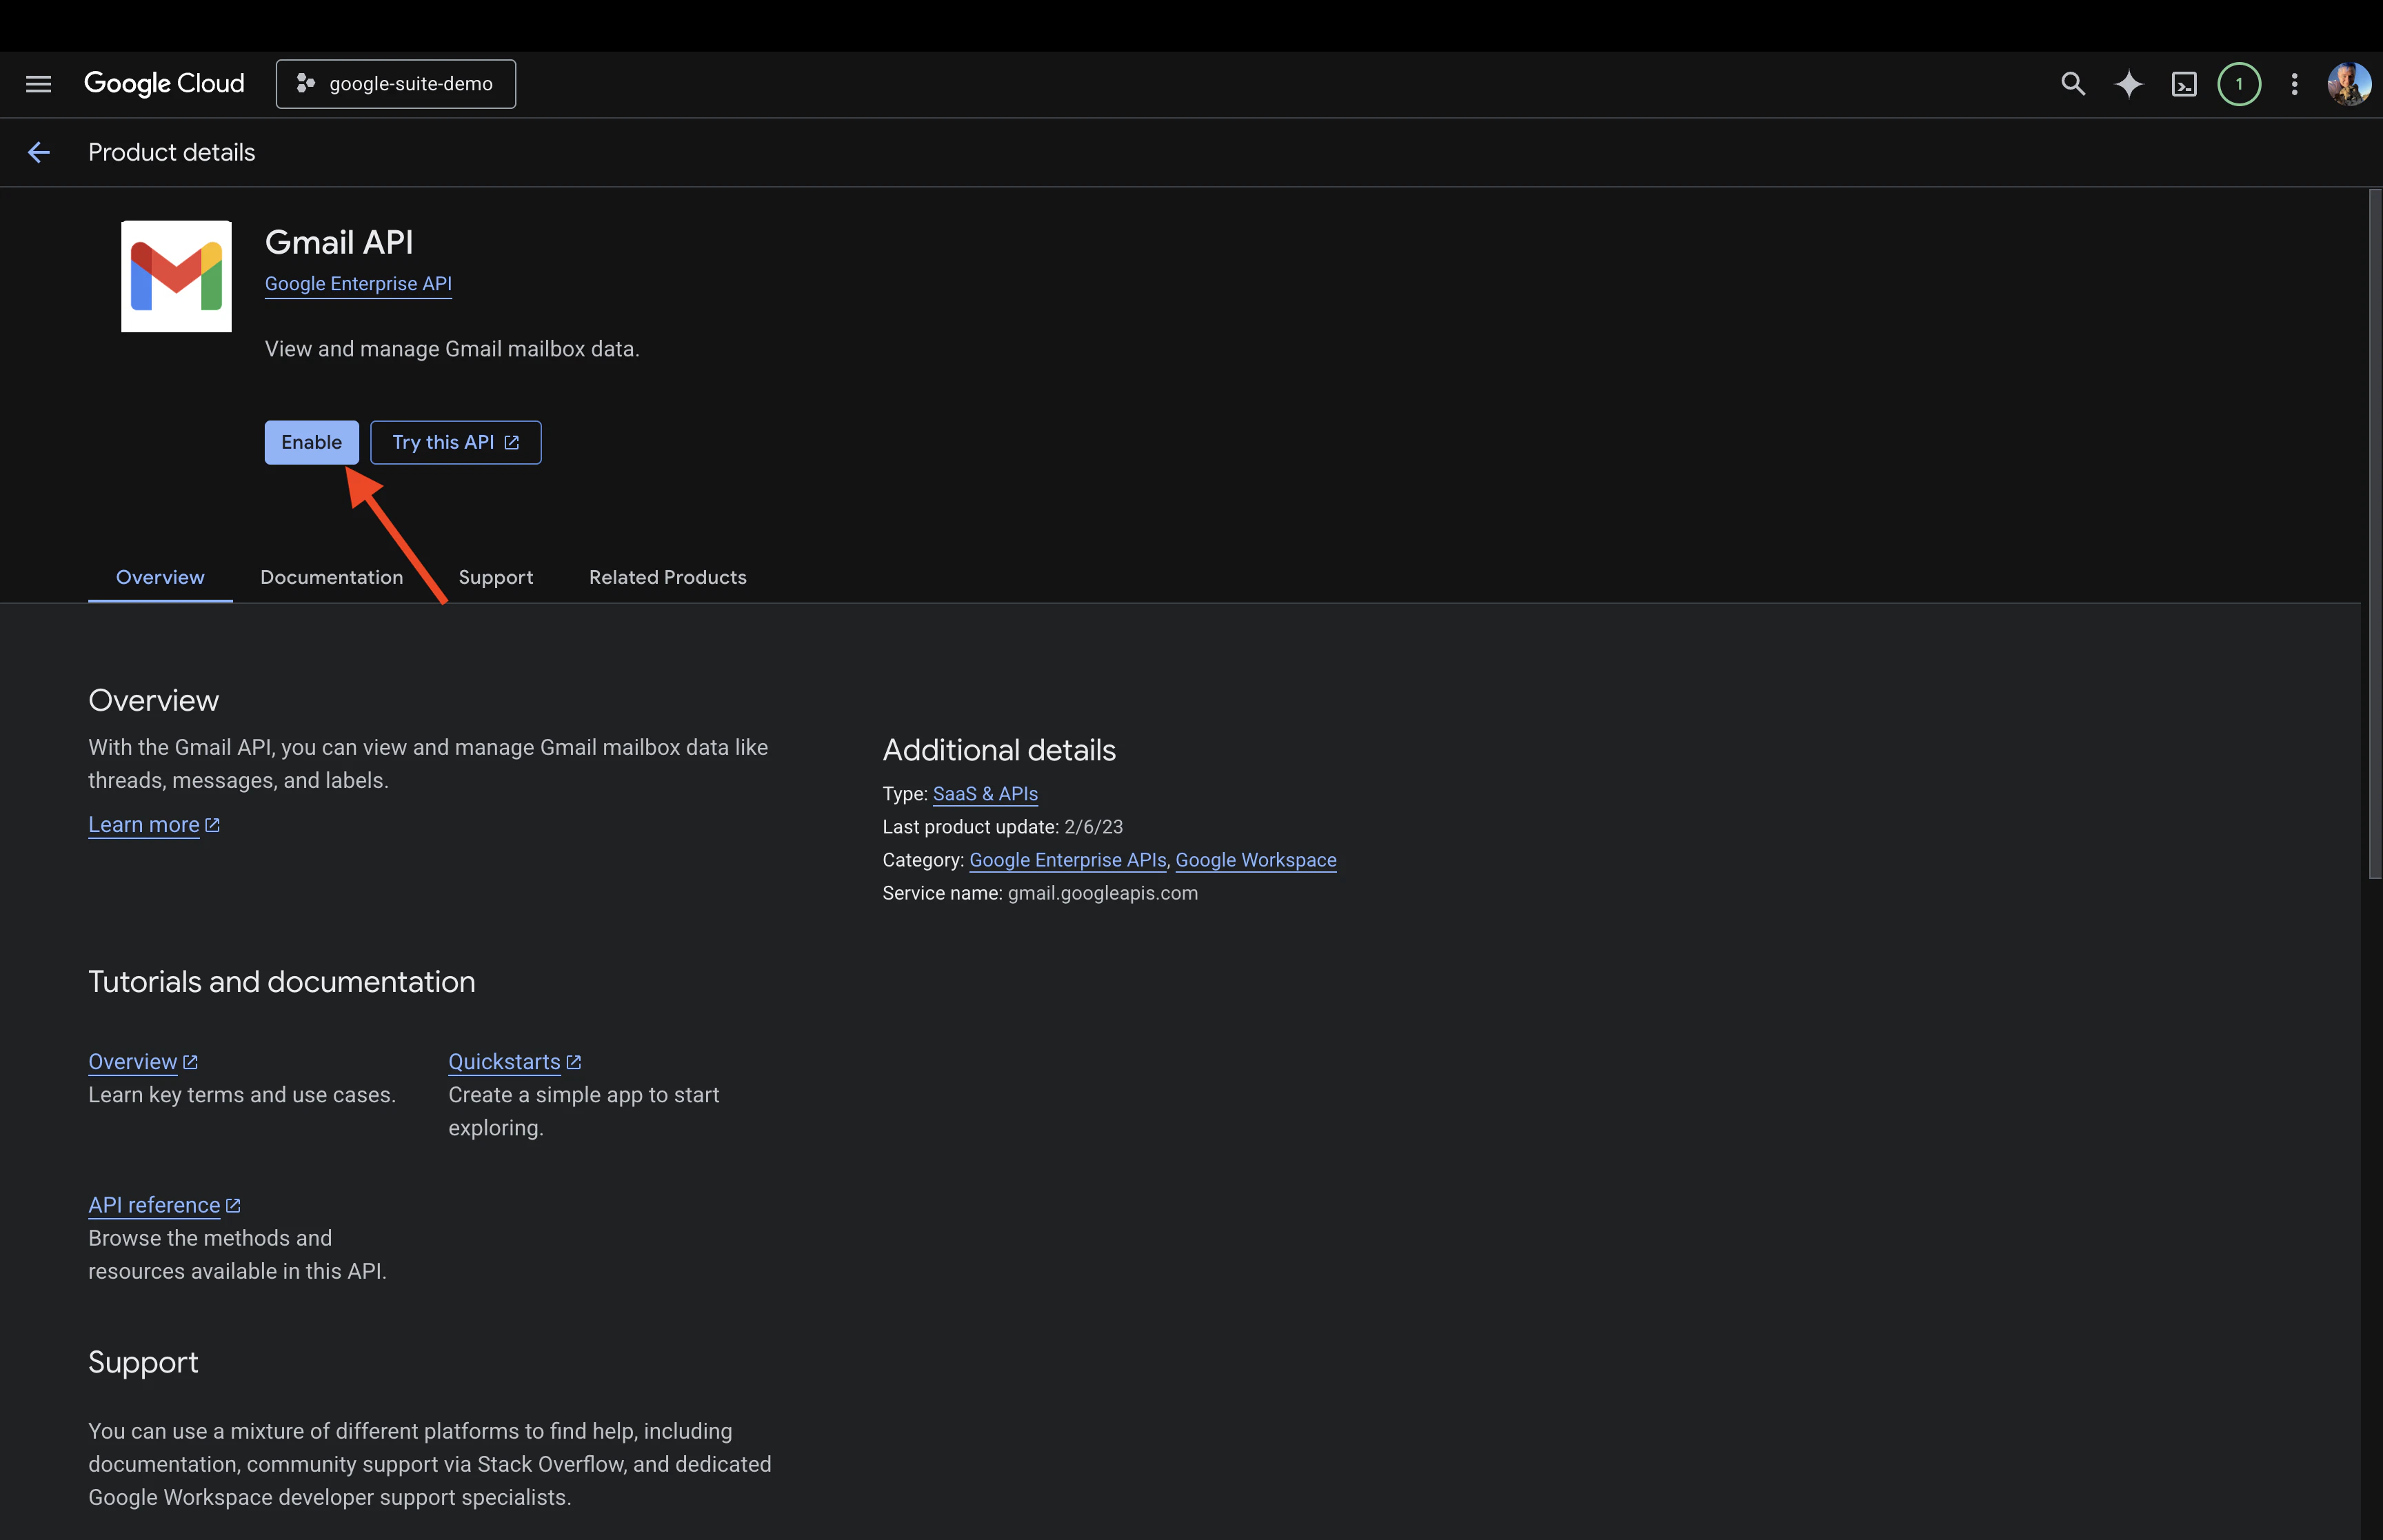
Enable APIs for corresponding integrations that you want to enable. When opening links, make sure the project is set to the correct one in the dropdown in the top left corner
Navigate to [Gmail API](https://console.cloud.google.com/apis/library/gmail.googleapis.com), click **Enable**
### Step 2: Enable required APIs
Enable APIs for corresponding integrations that you want to enable. When opening links, make sure the project is set to the correct one in the dropdown in the top left corner
Navigate to [Gmail API](https://console.cloud.google.com/apis/library/gmail.googleapis.com), click **Enable**
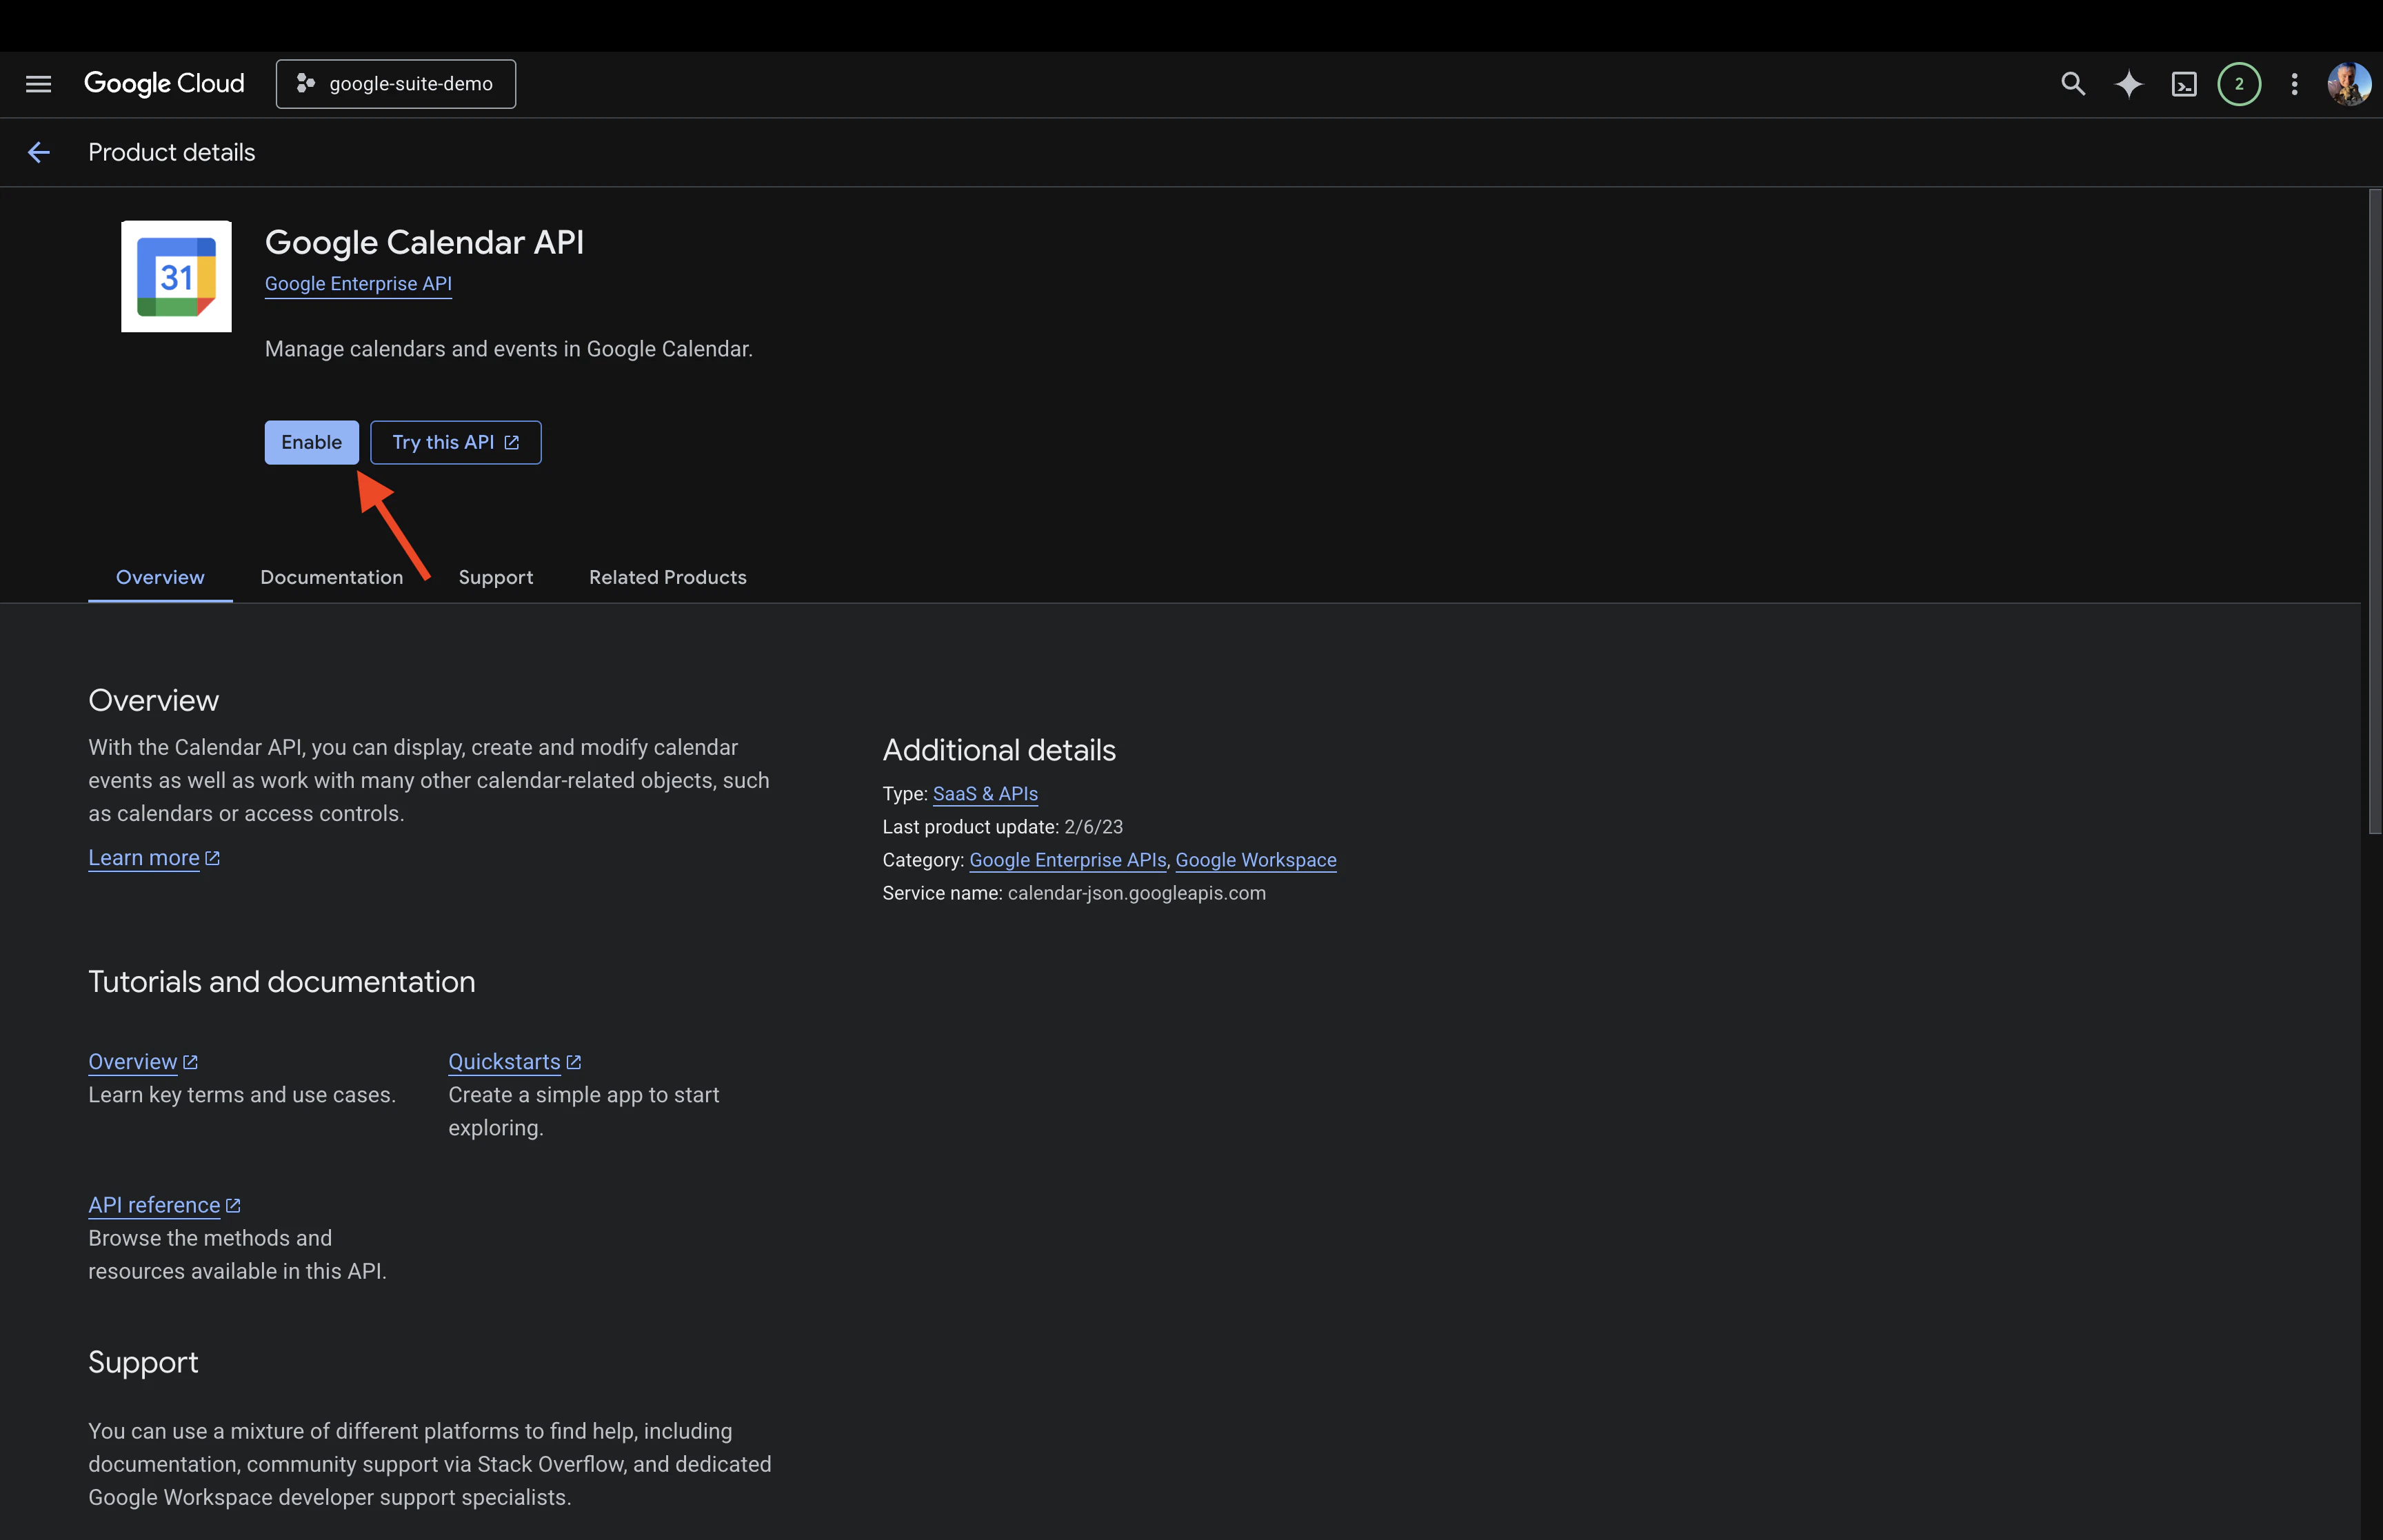
 Navigate to [Google Calendar API](https://console.cloud.google.com/apis/library/calendar-json.googleapis.com), click **Enable**
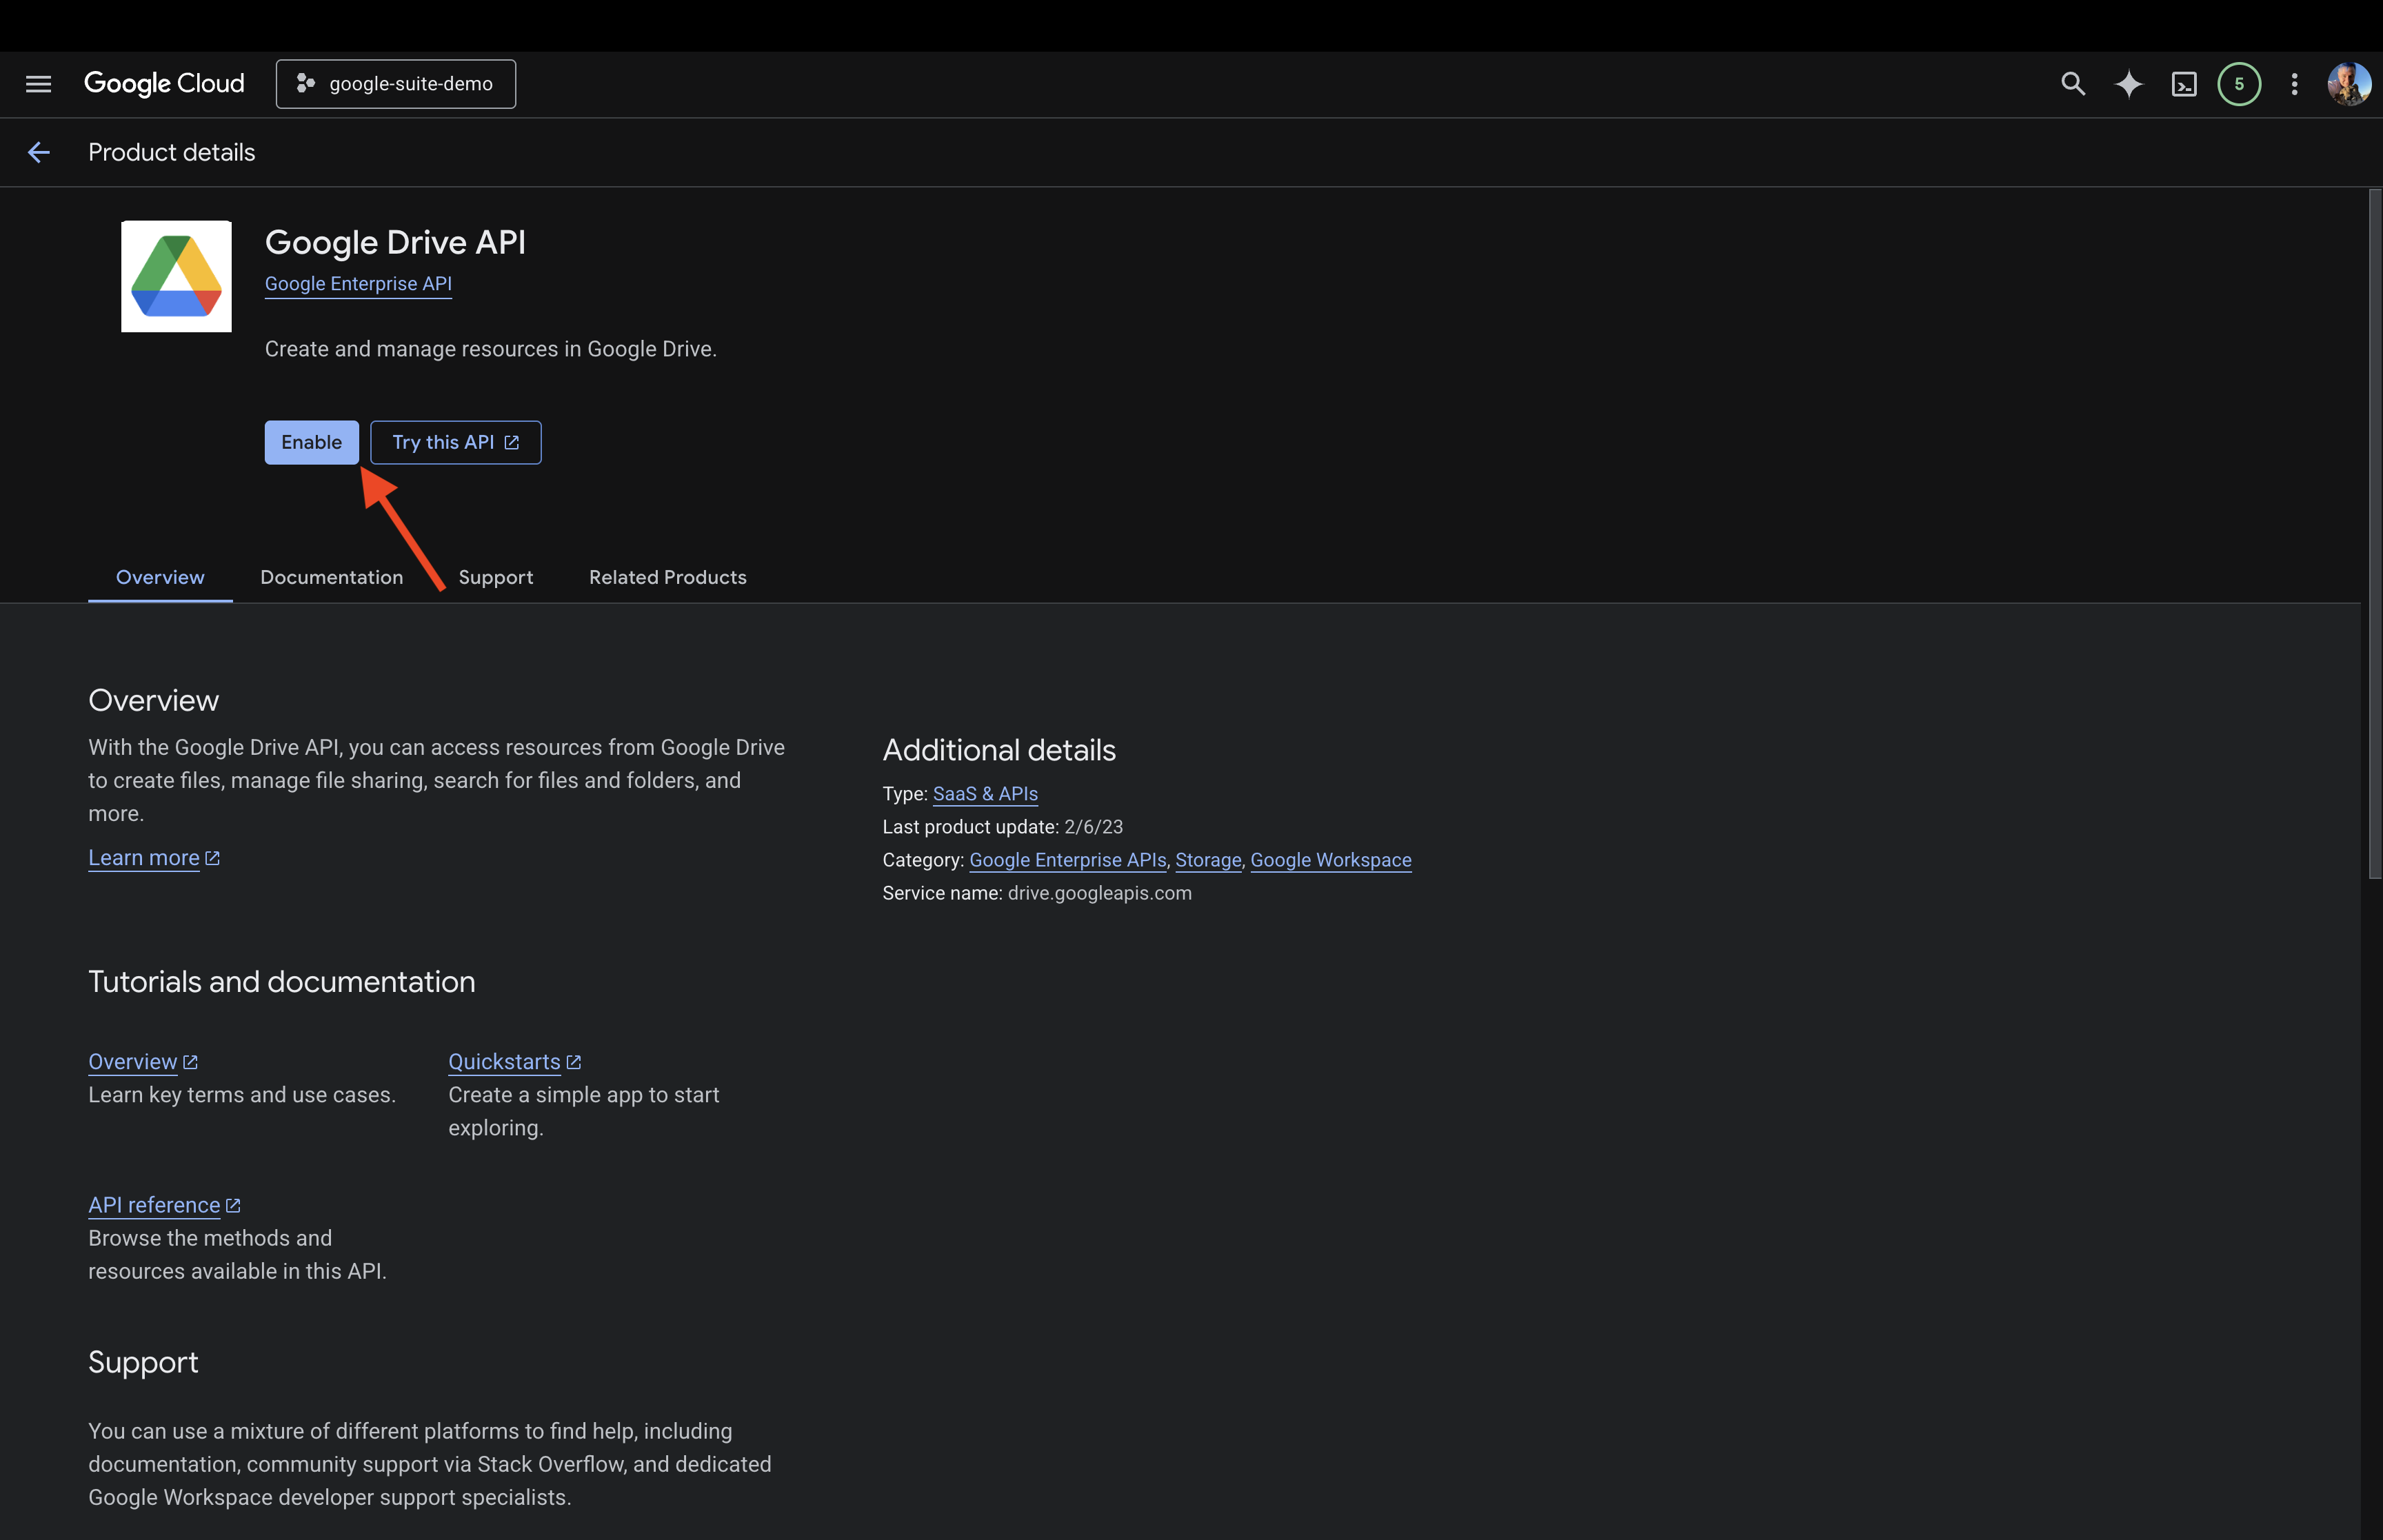
 Navigate to [Google Drive API](https://console.cloud.google.com/apis/library/drive.googleapis.com), click **Enable**
 ### Step 3: Connect in Zenflow
Navigate to **Settings → Integrations** in the Zenflow sidebar (the gear icon at the bottom left).
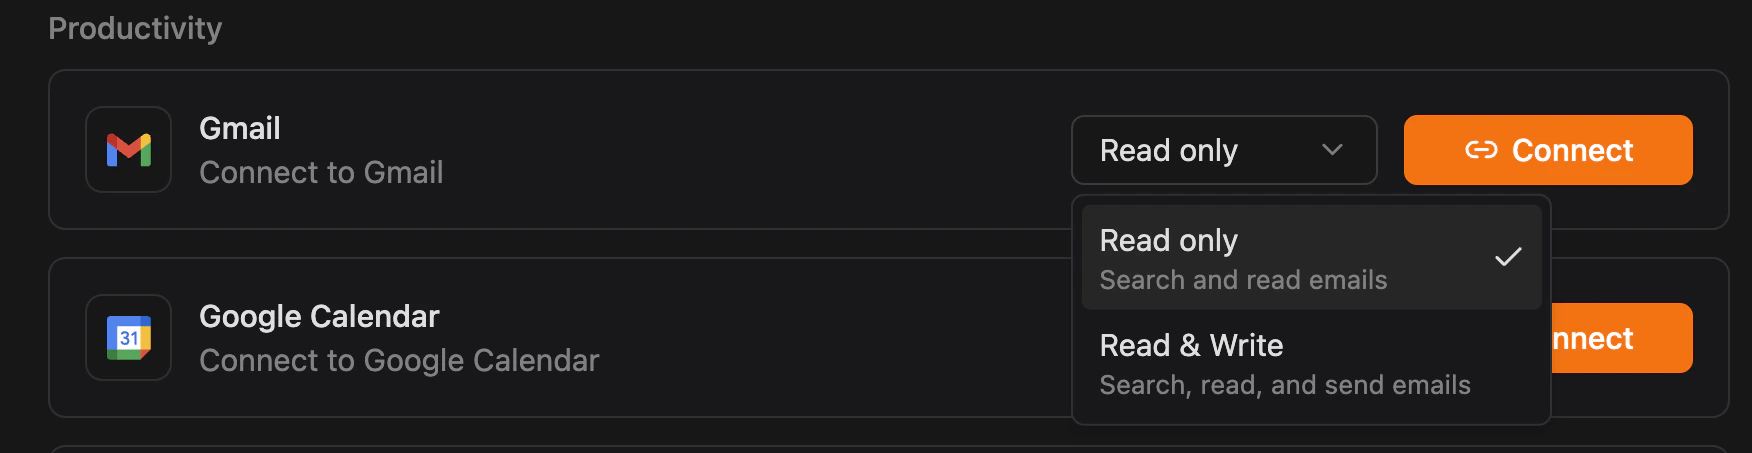
Locate **Gmail** in the Integrations Catalog.
Select **Read only** or **Read & Write** from the dropdown depending on your needs.
### Step 3: Connect in Zenflow
Navigate to **Settings → Integrations** in the Zenflow sidebar (the gear icon at the bottom left).
Locate **Gmail** in the Integrations Catalog.
Select **Read only** or **Read & Write** from the dropdown depending on your needs.
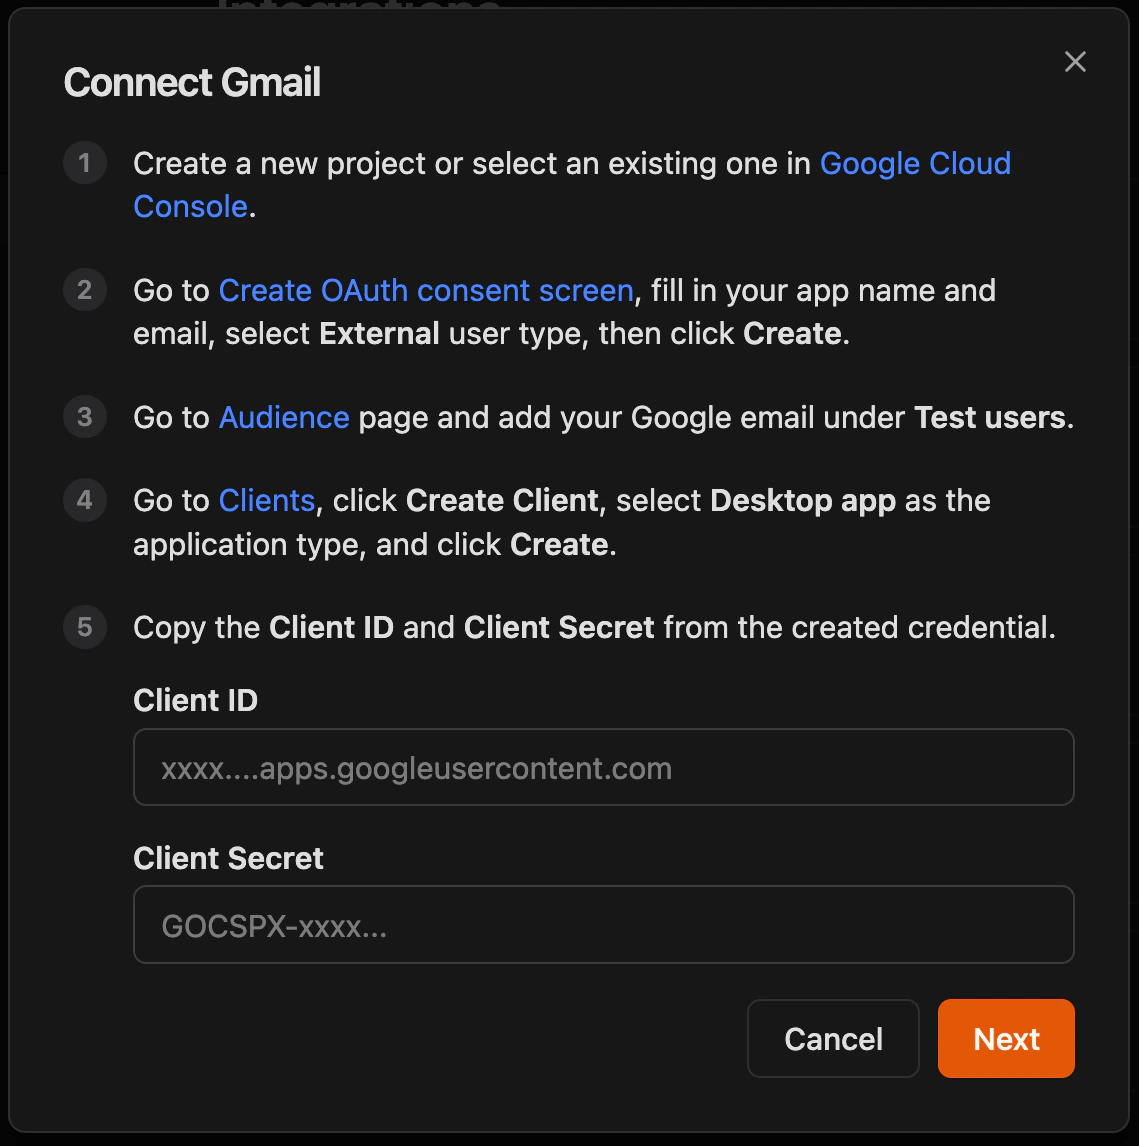
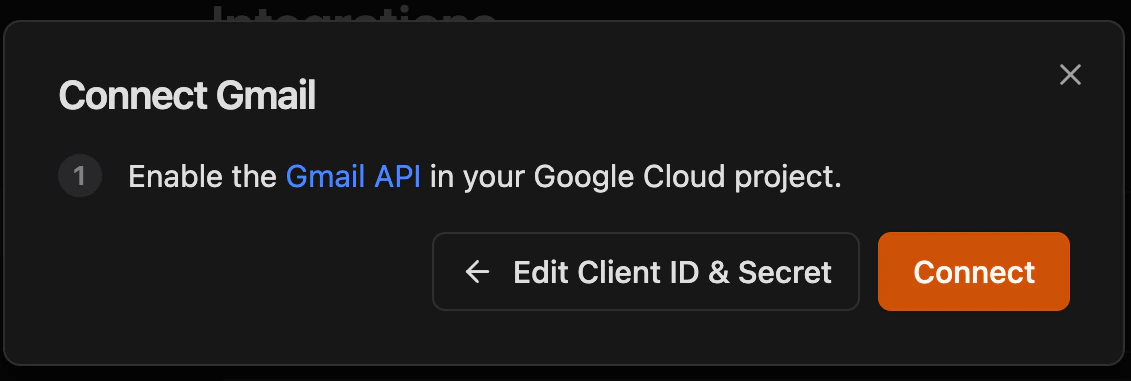
 Click **Connect**, paste your **Client ID** and **Client Secret** from OAuth client created above, then click **Next**, enable Gmail API if haven't done so yet (see Step 2 above) and click **Connect**
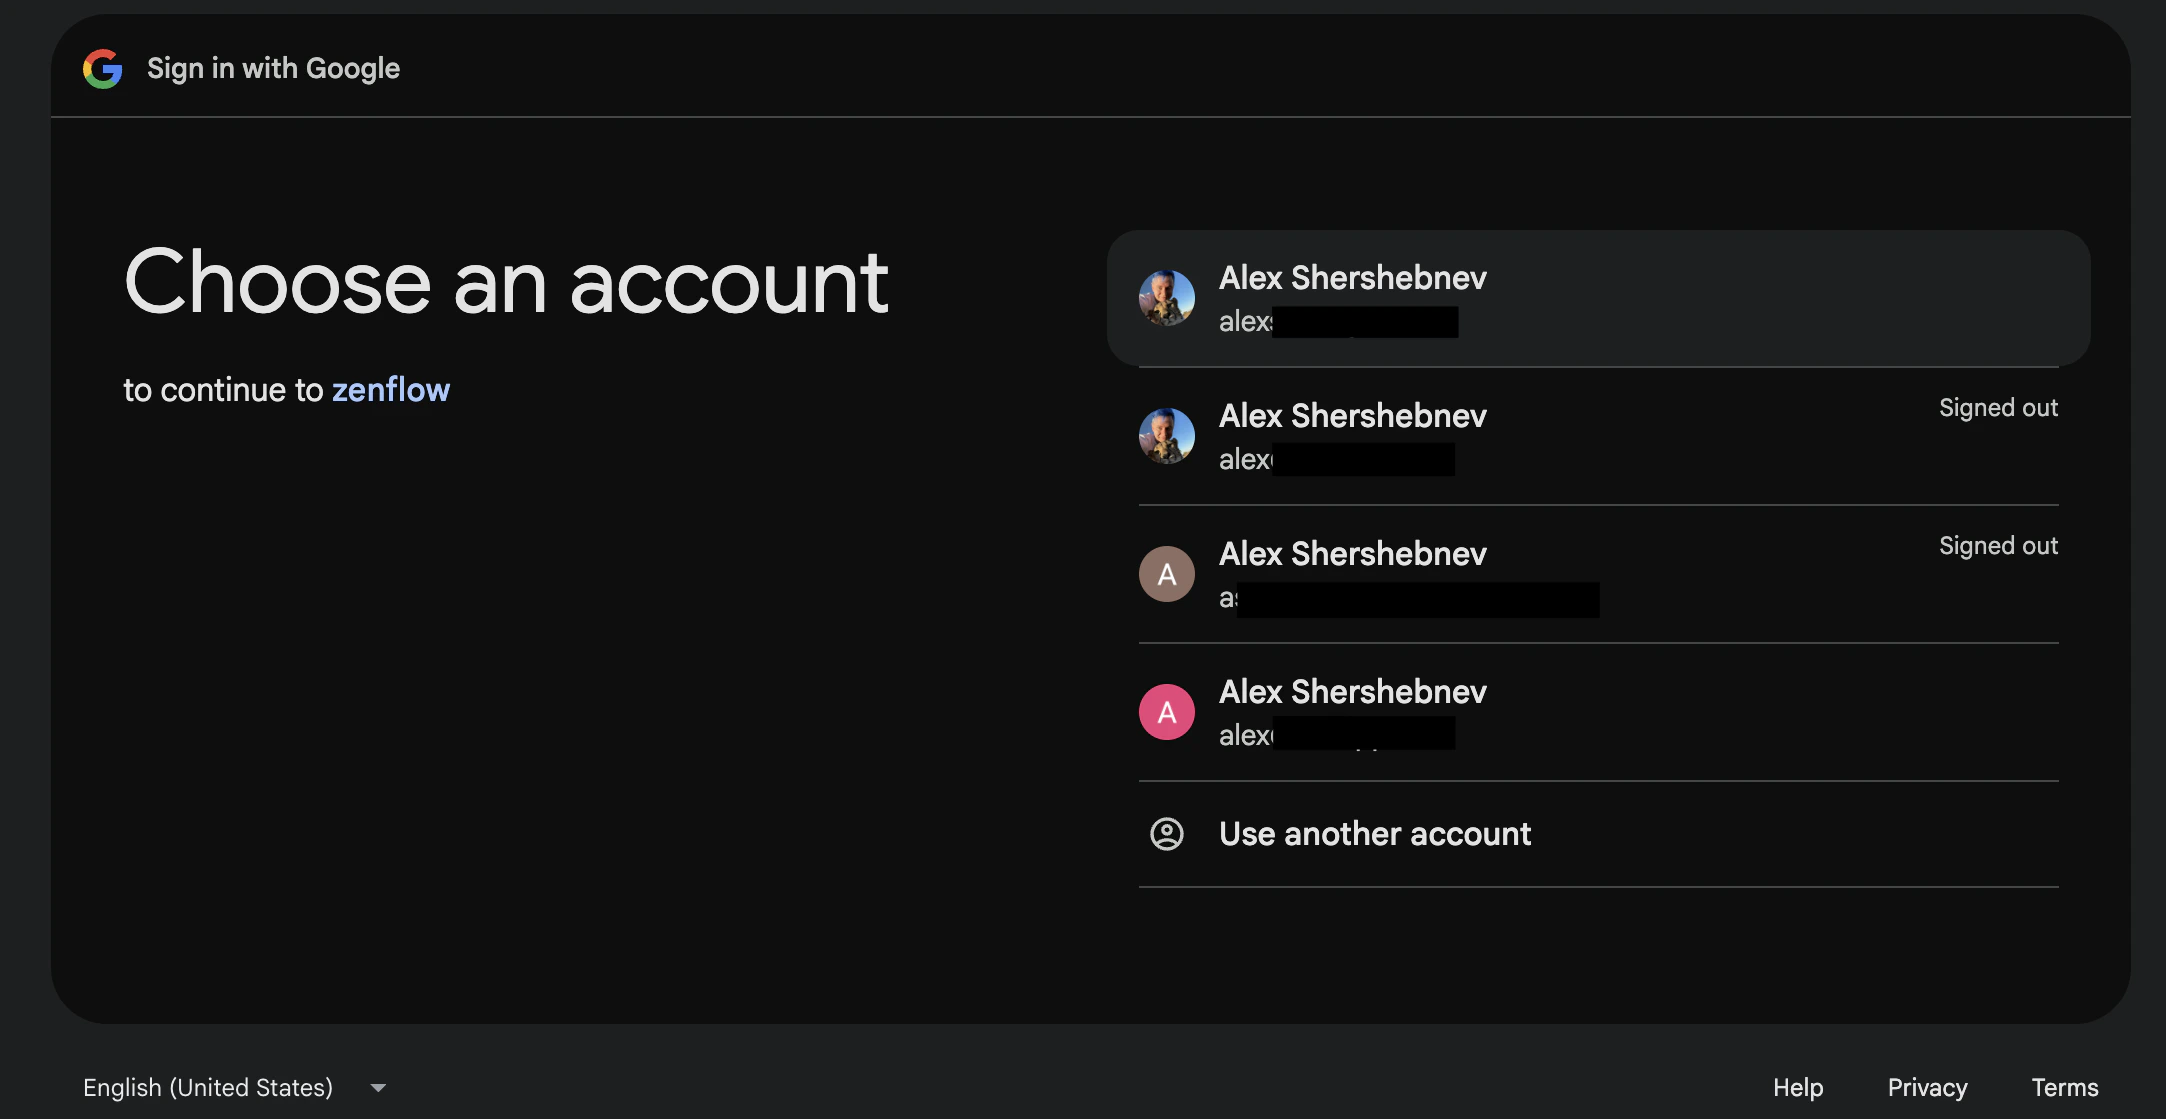
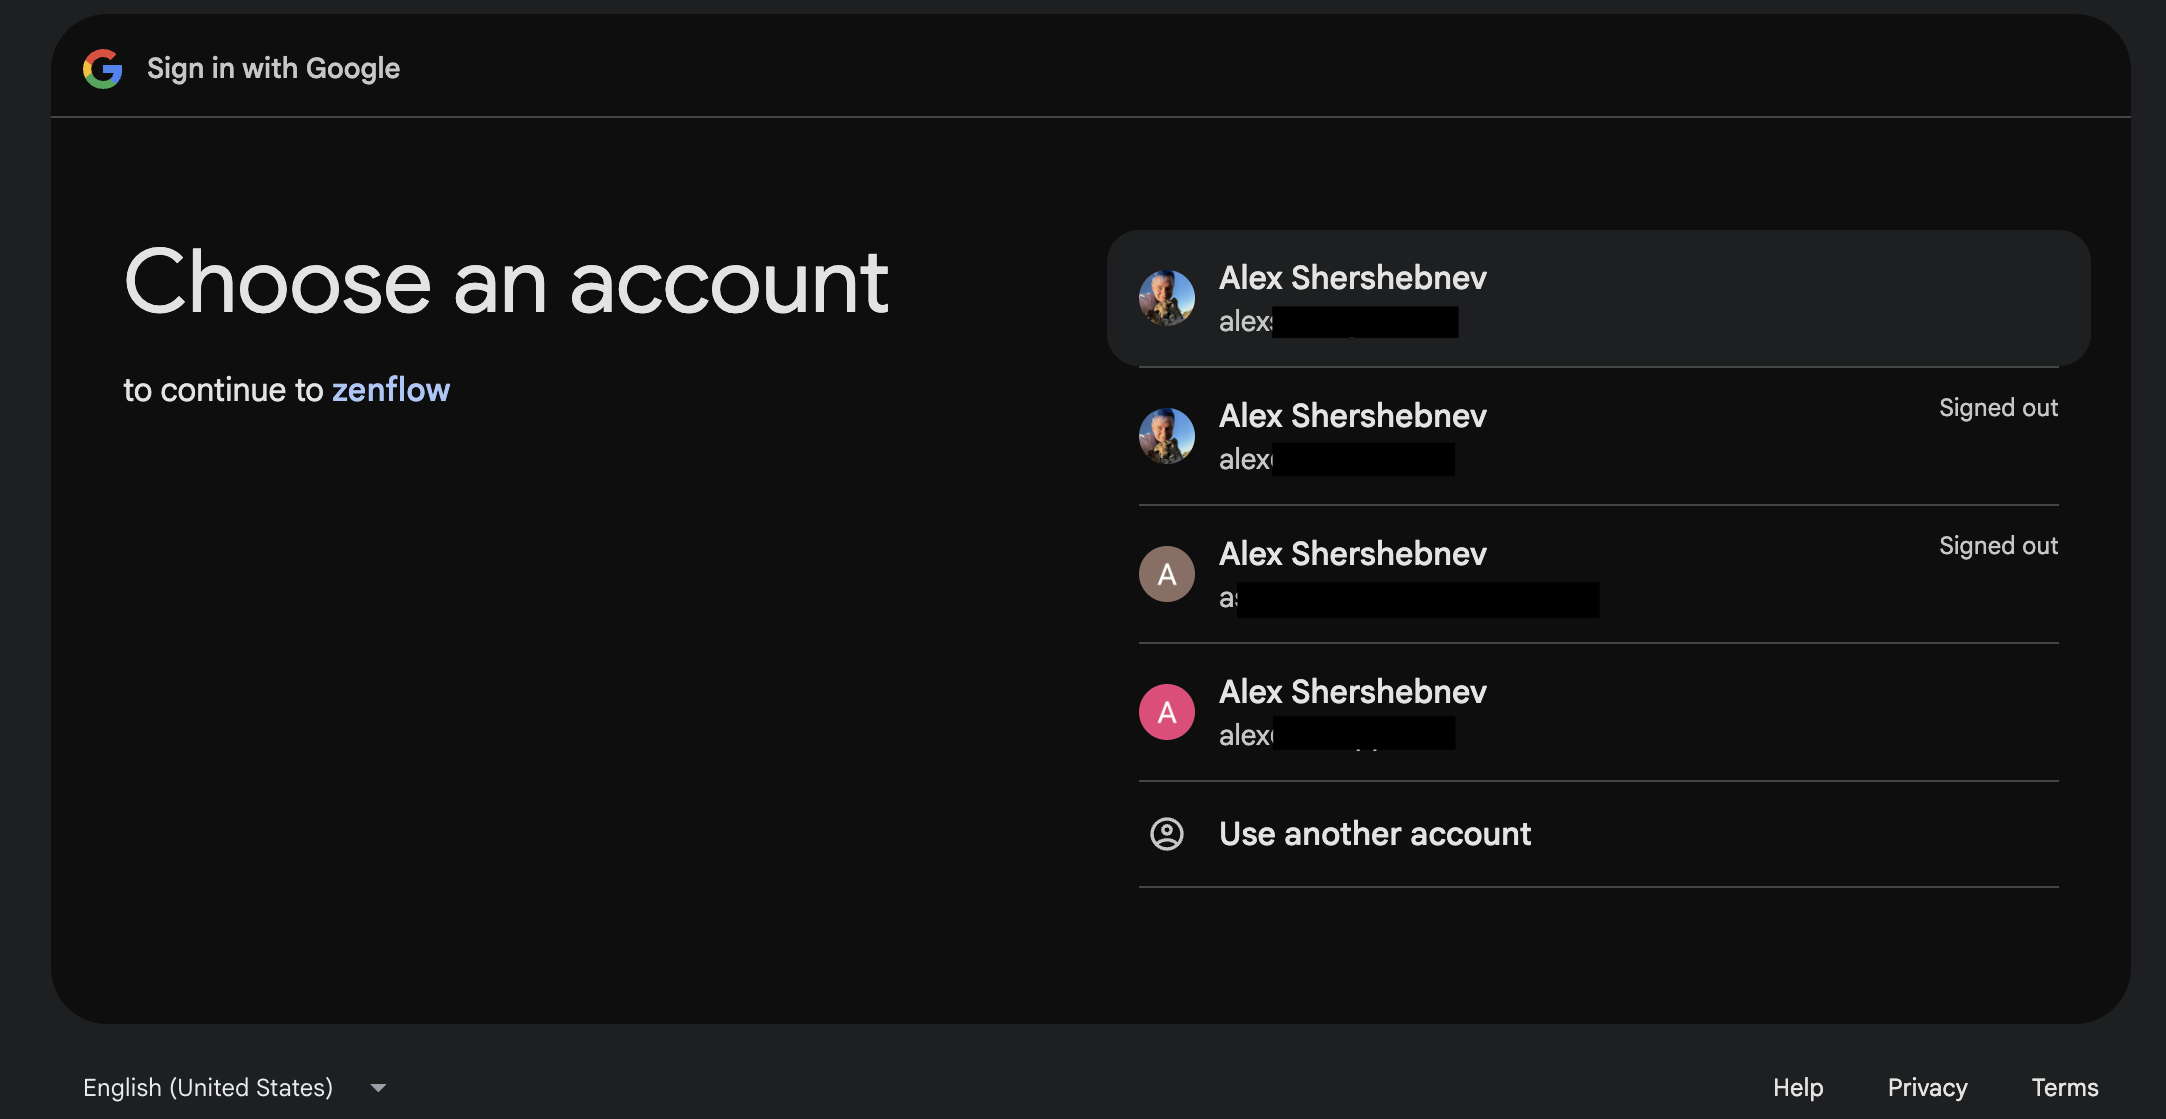
 You will be redirected to a webpage where you need to select which account you want to connect
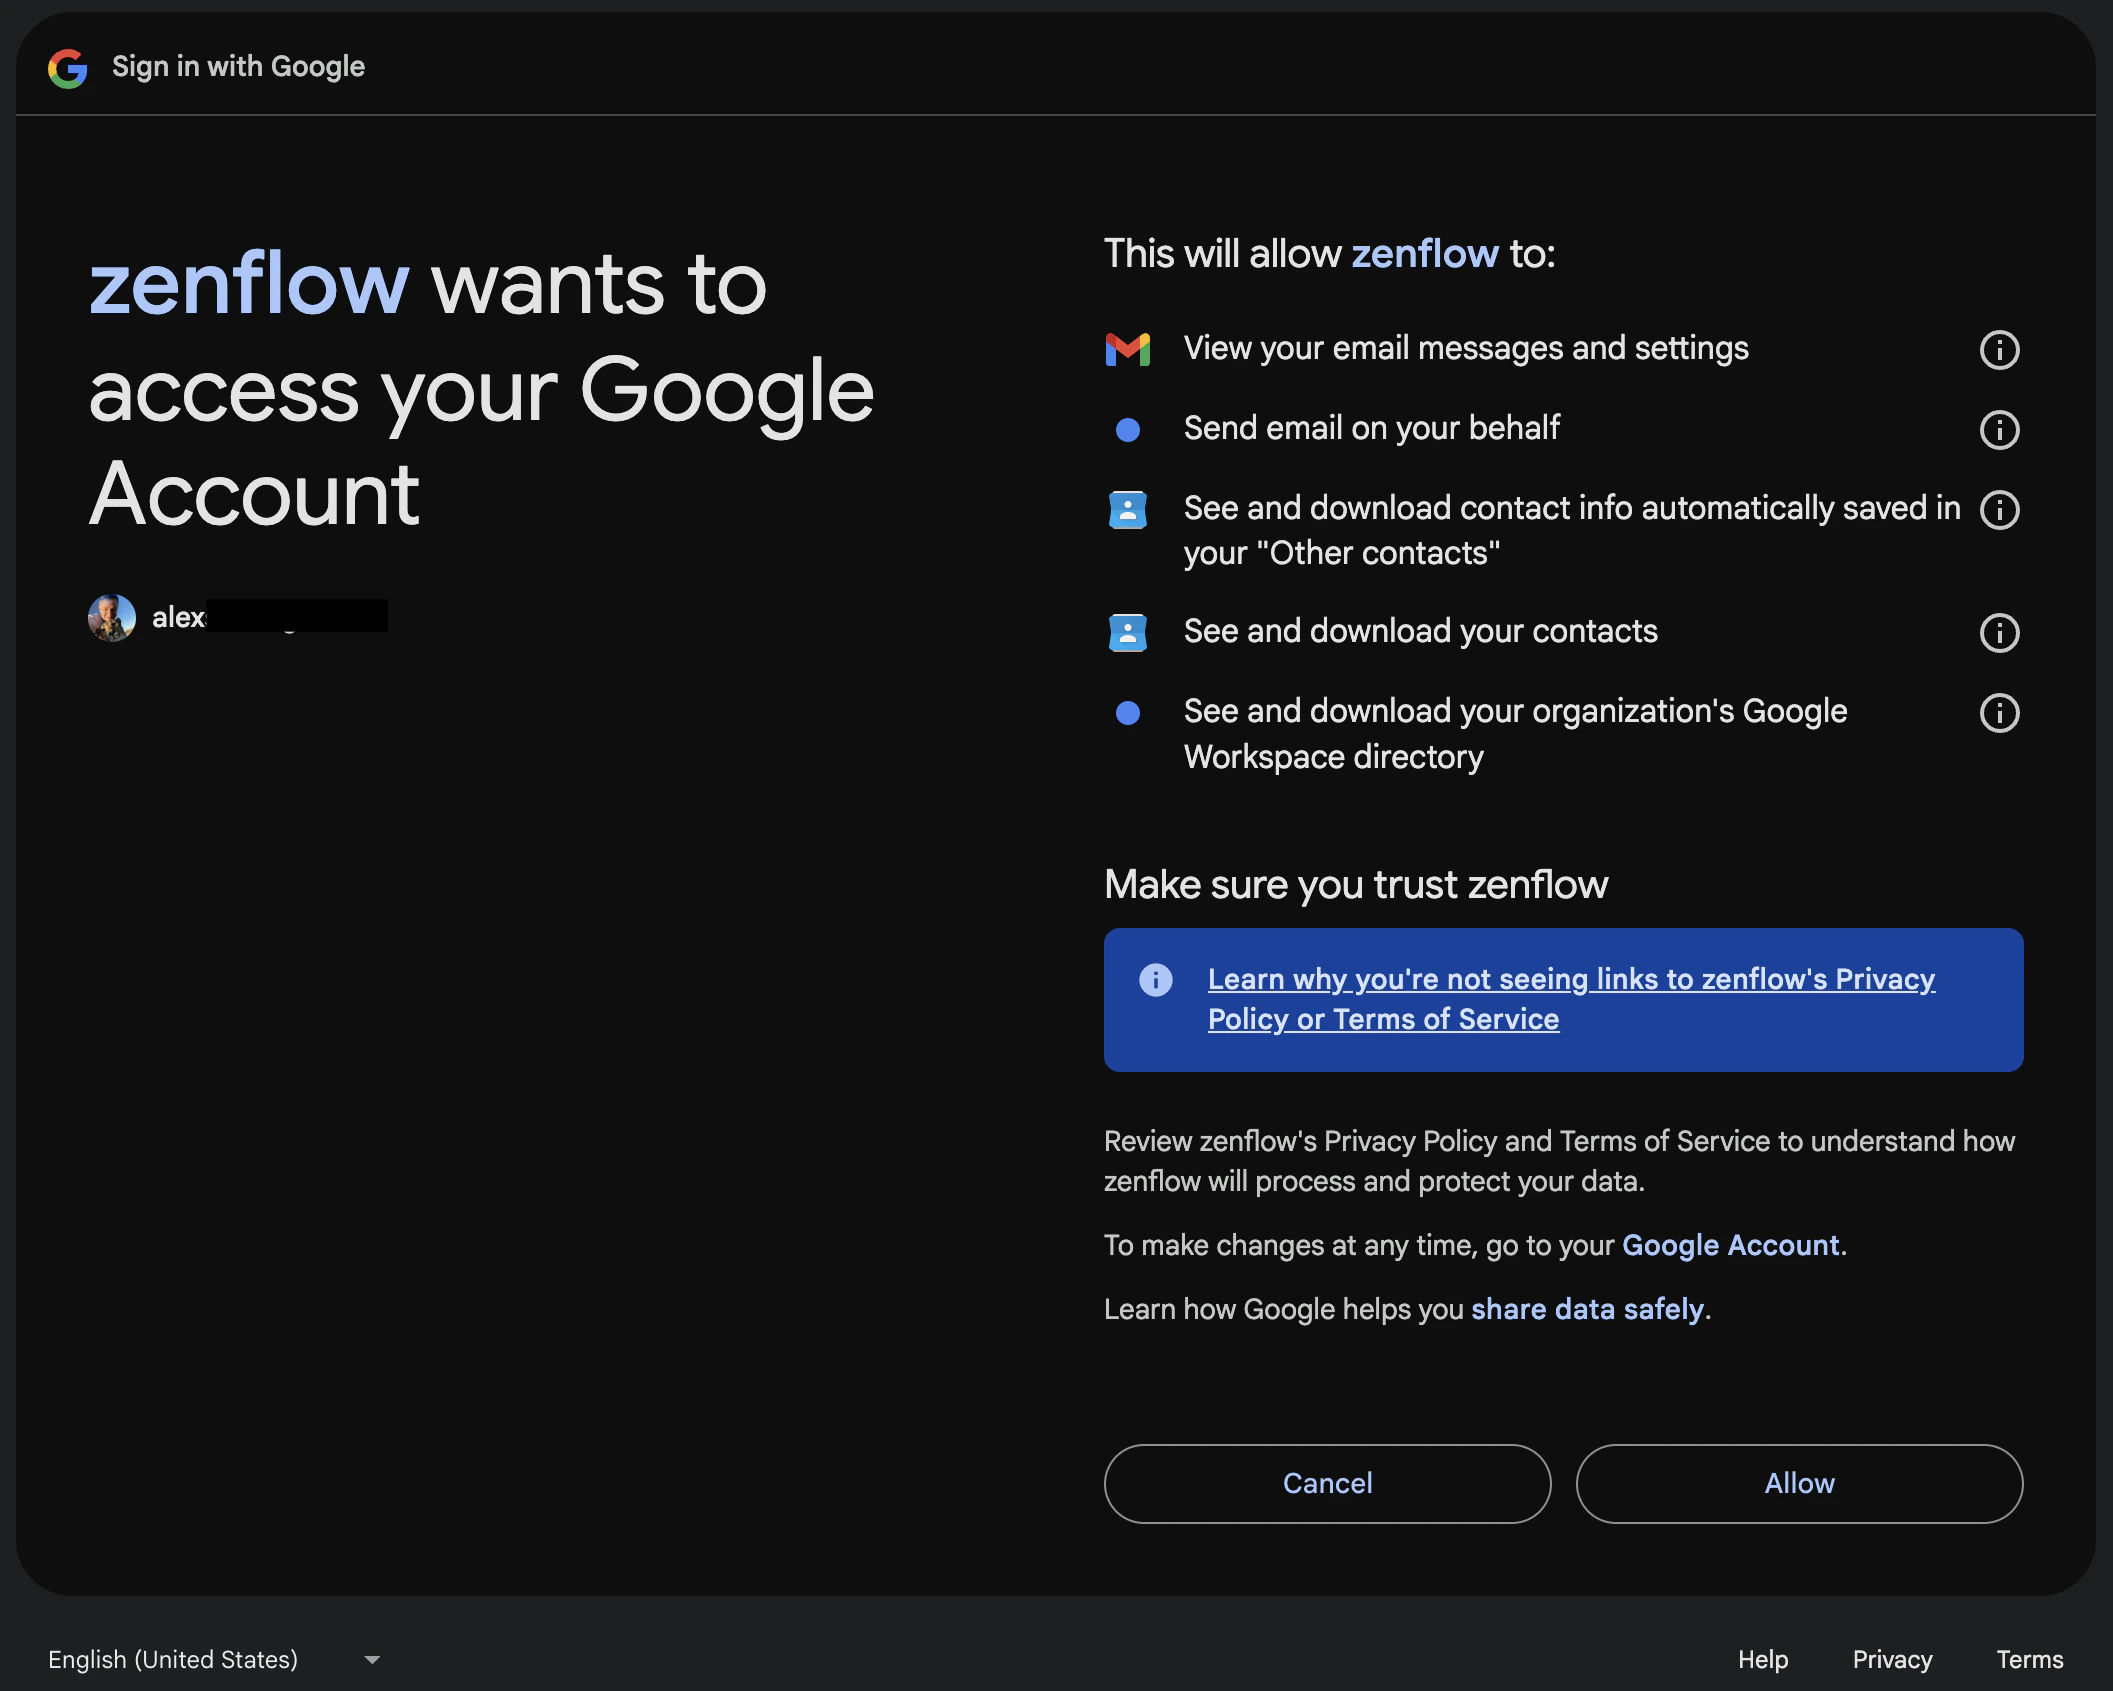
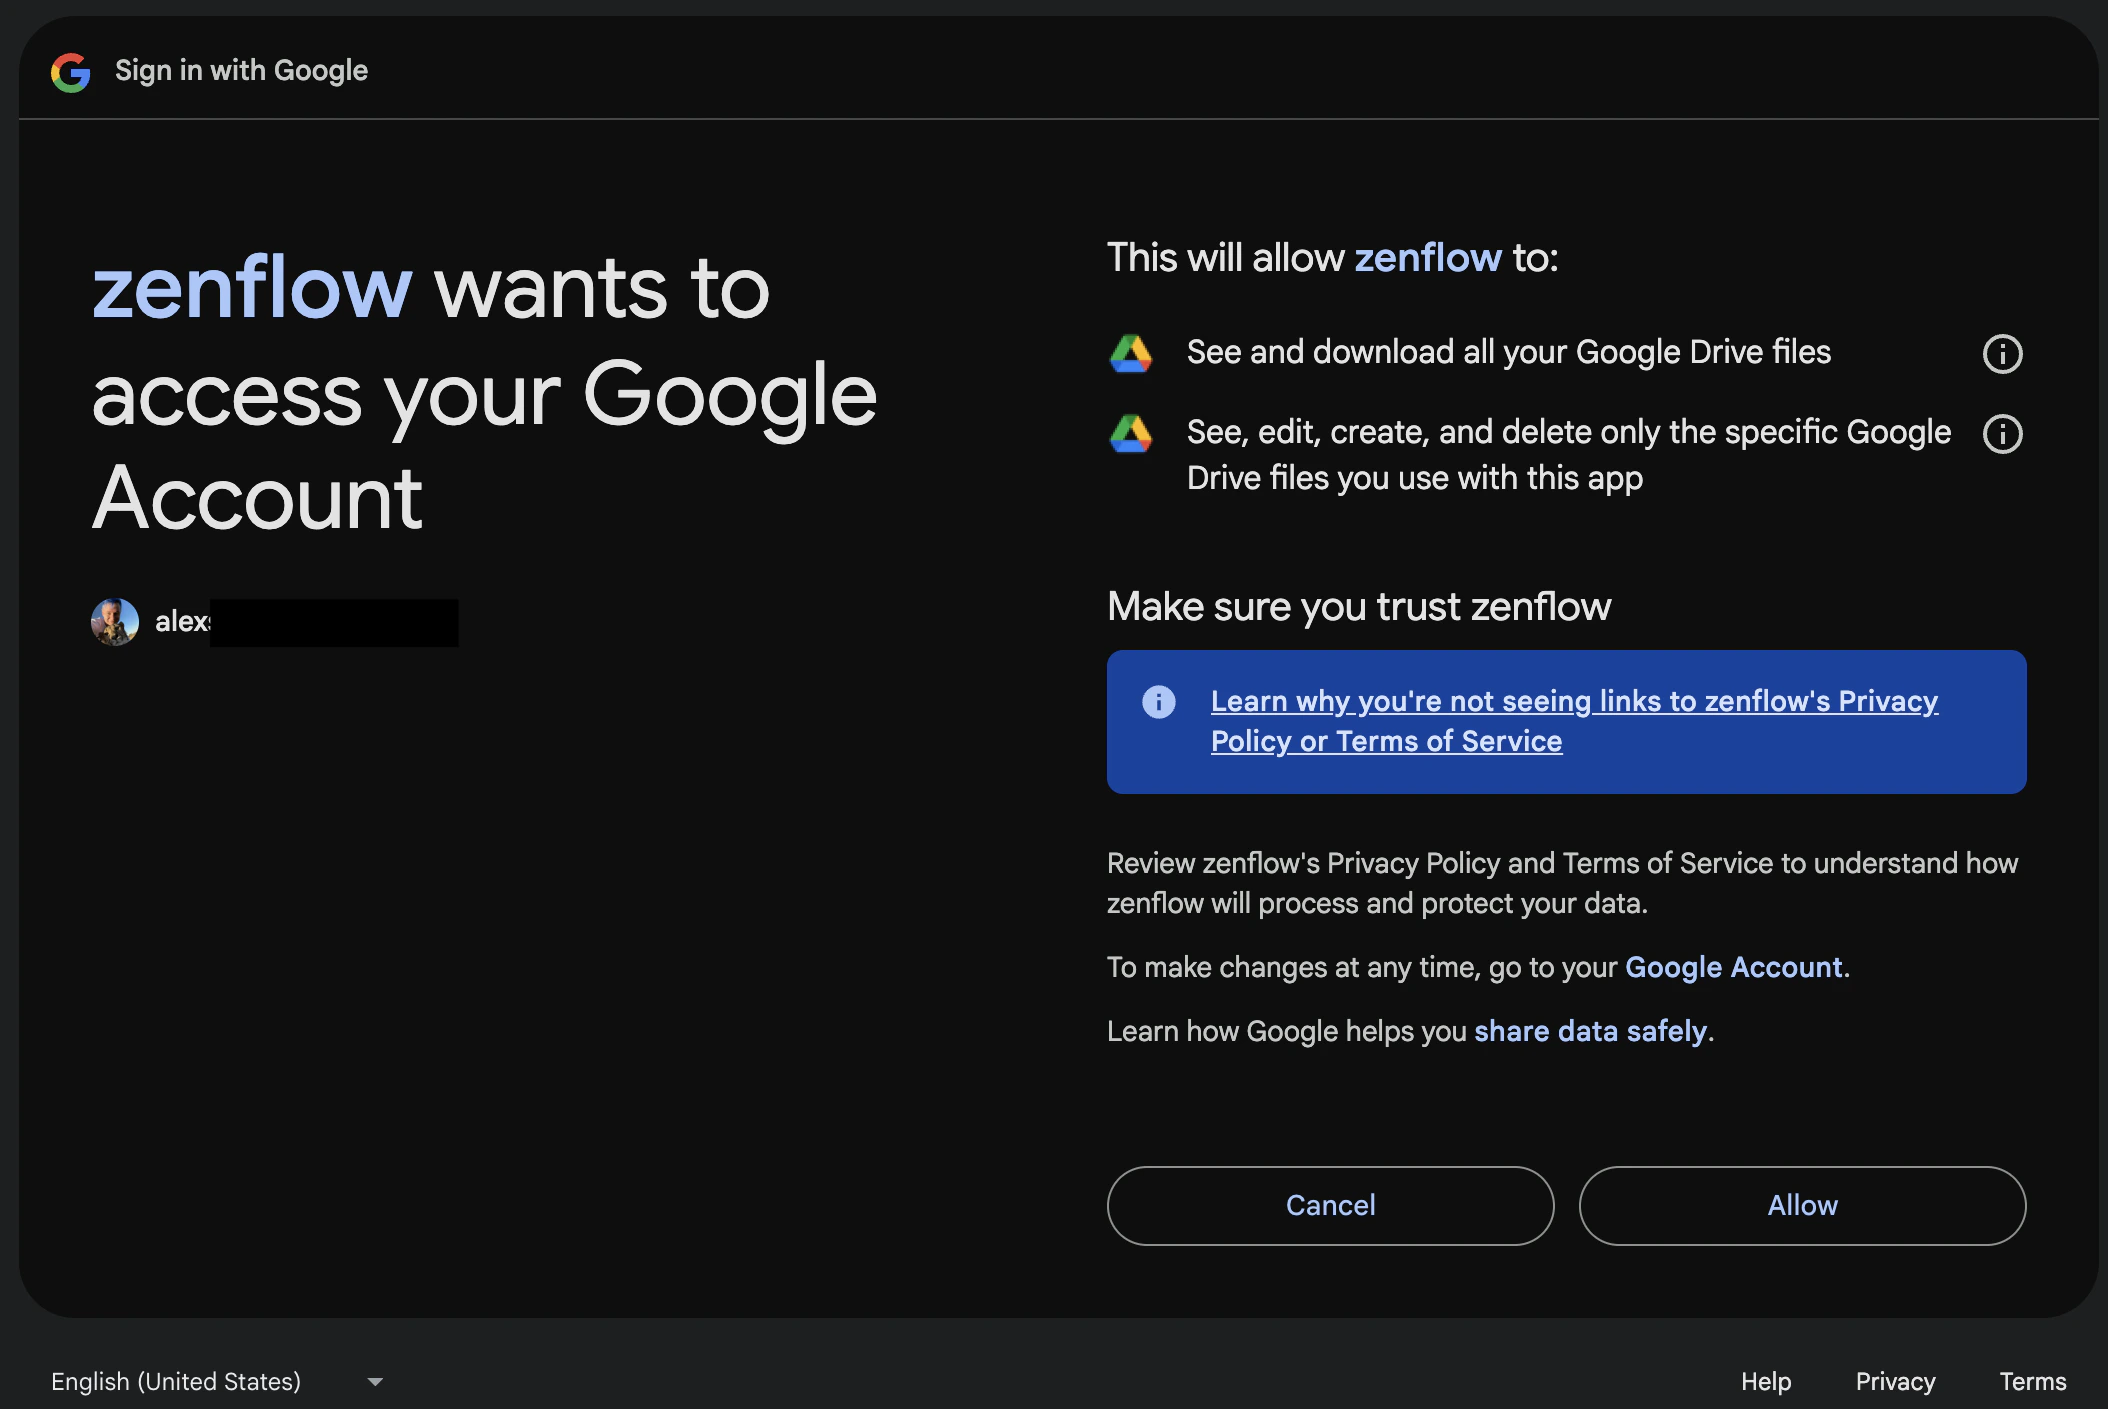
 After choosing an account, you'll be redirected to the access authorization screen. If you've chosen **Read only** your scopes might be different from the screenshot below (it is for **Read & Write**)
 Navigate to **Settings → Integrations** in the Zenflow sidebar.
Locate **Google Calendar** in the Integrations Catalog.
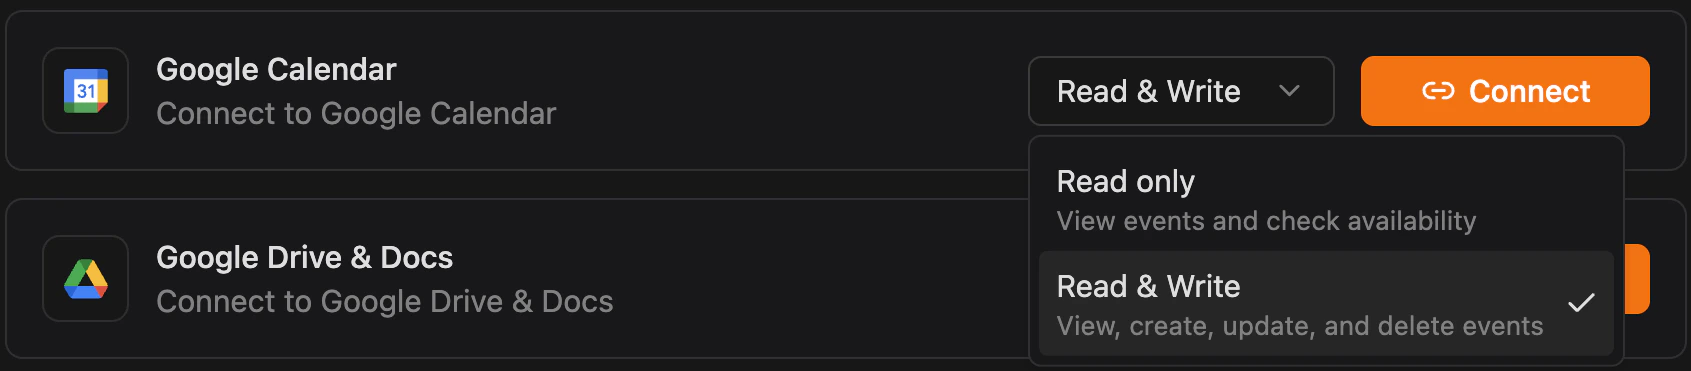
Select **Read only** or **Read & Write** from the dropdown depending on your needs.
Navigate to **Settings → Integrations** in the Zenflow sidebar.
Locate **Google Calendar** in the Integrations Catalog.
Select **Read only** or **Read & Write** from the dropdown depending on your needs.
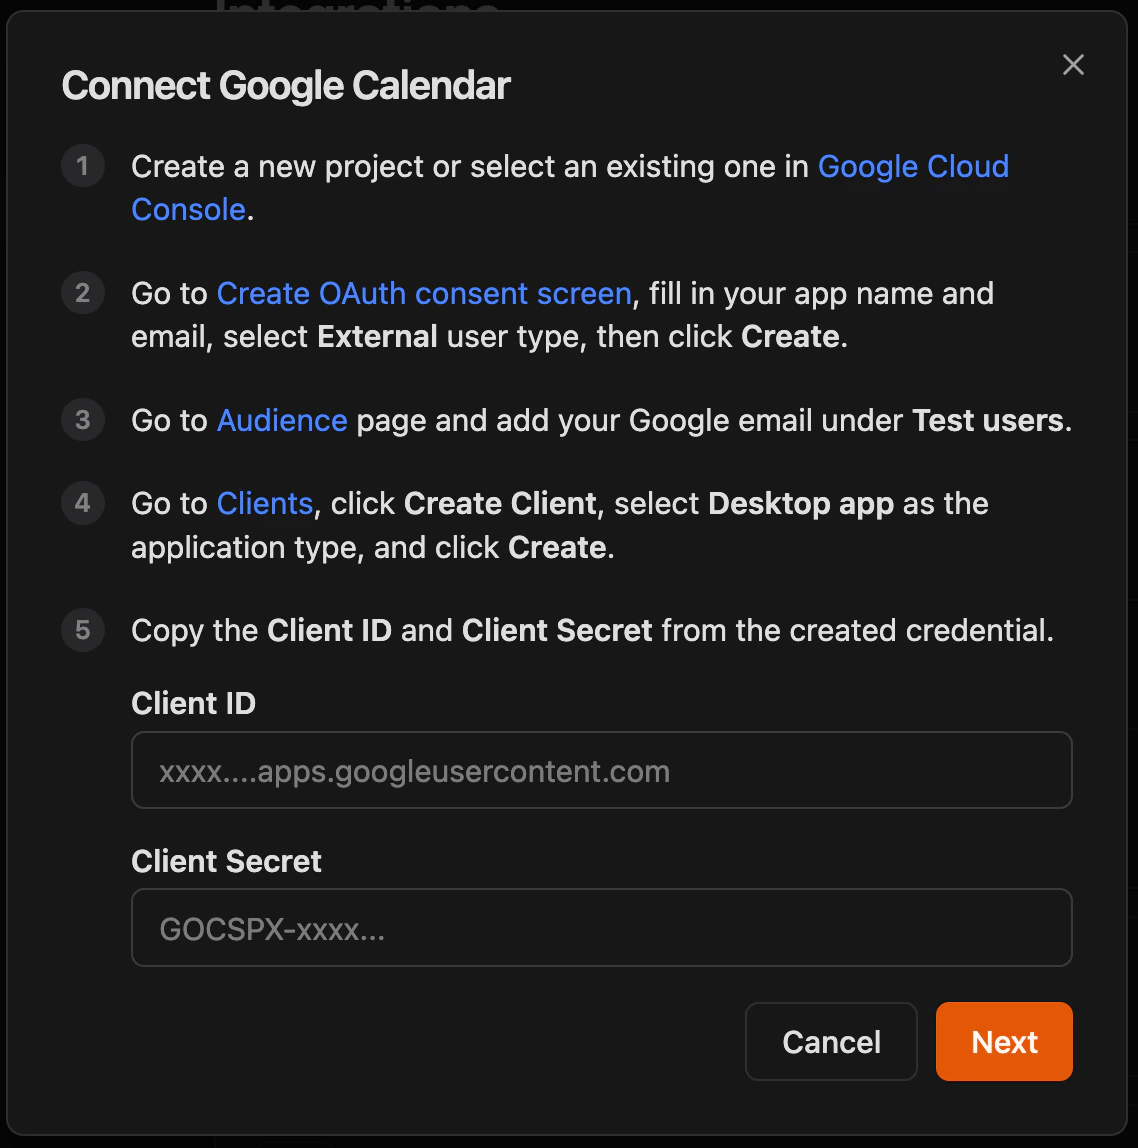
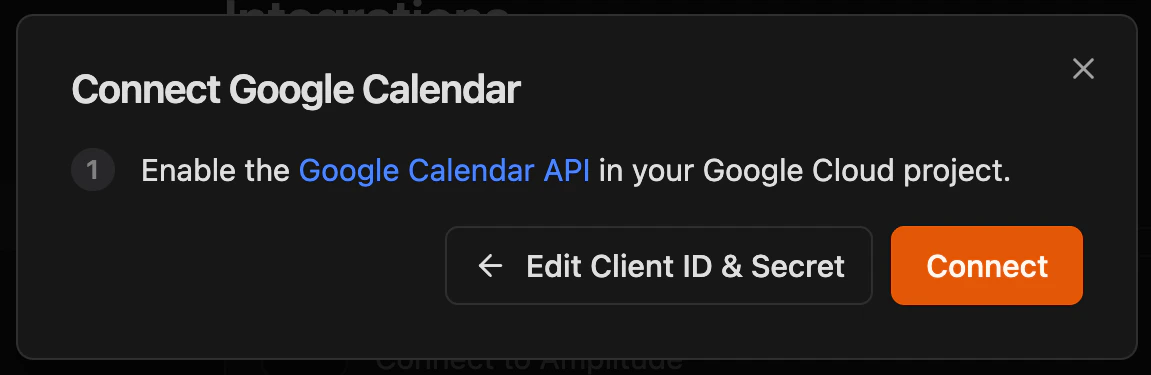
 Click **Connect**, paste your **Client ID** and **Client Secret** from OAuth client created above, then click **Next**, enable Google Calendar API if haven't done so yet (see Step 2 above) and click **Connect**
 You will be redirected to a webpage where you need to select which account you want to connect
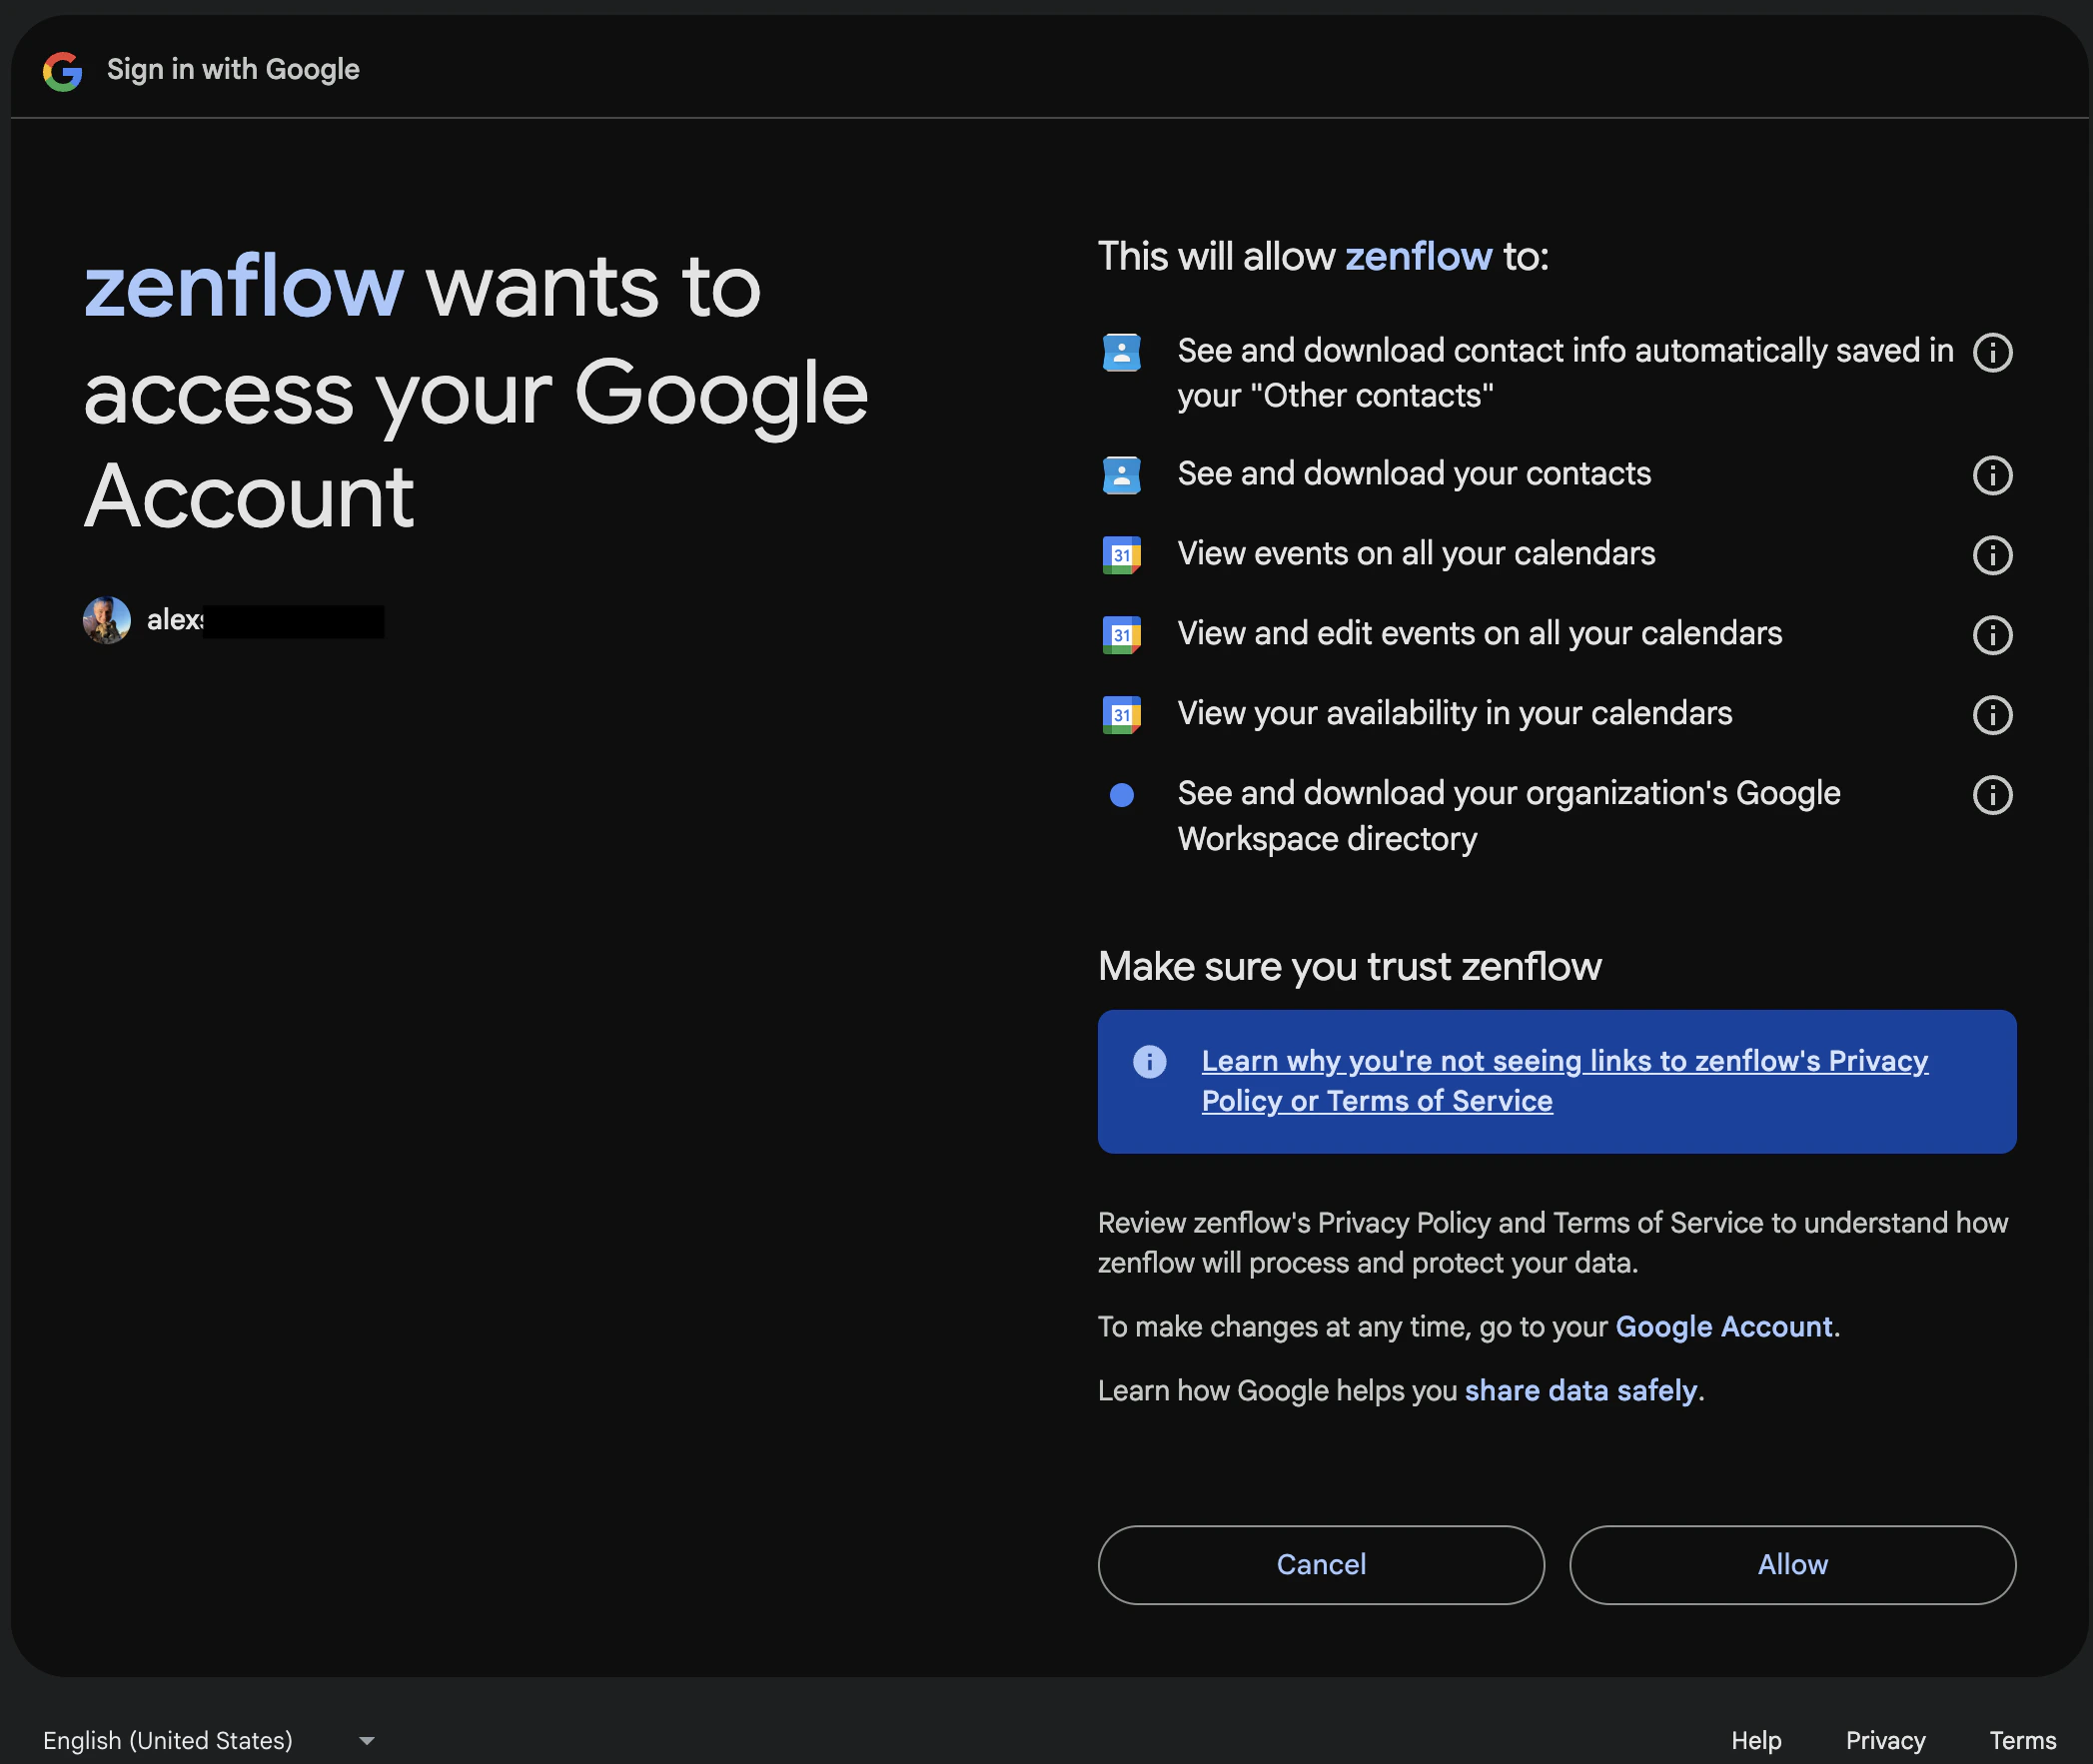
 After choosing an account, you'll be redirected to the access authorization screen. If you've chosen **Read only** your scopes might be different from the screenshot below (it is for **Read & Write**)
 Navigate to **Settings → Integrations** in the Zenflow sidebar.
Locate **Google Drive & Docs** in the Integrations Catalog.
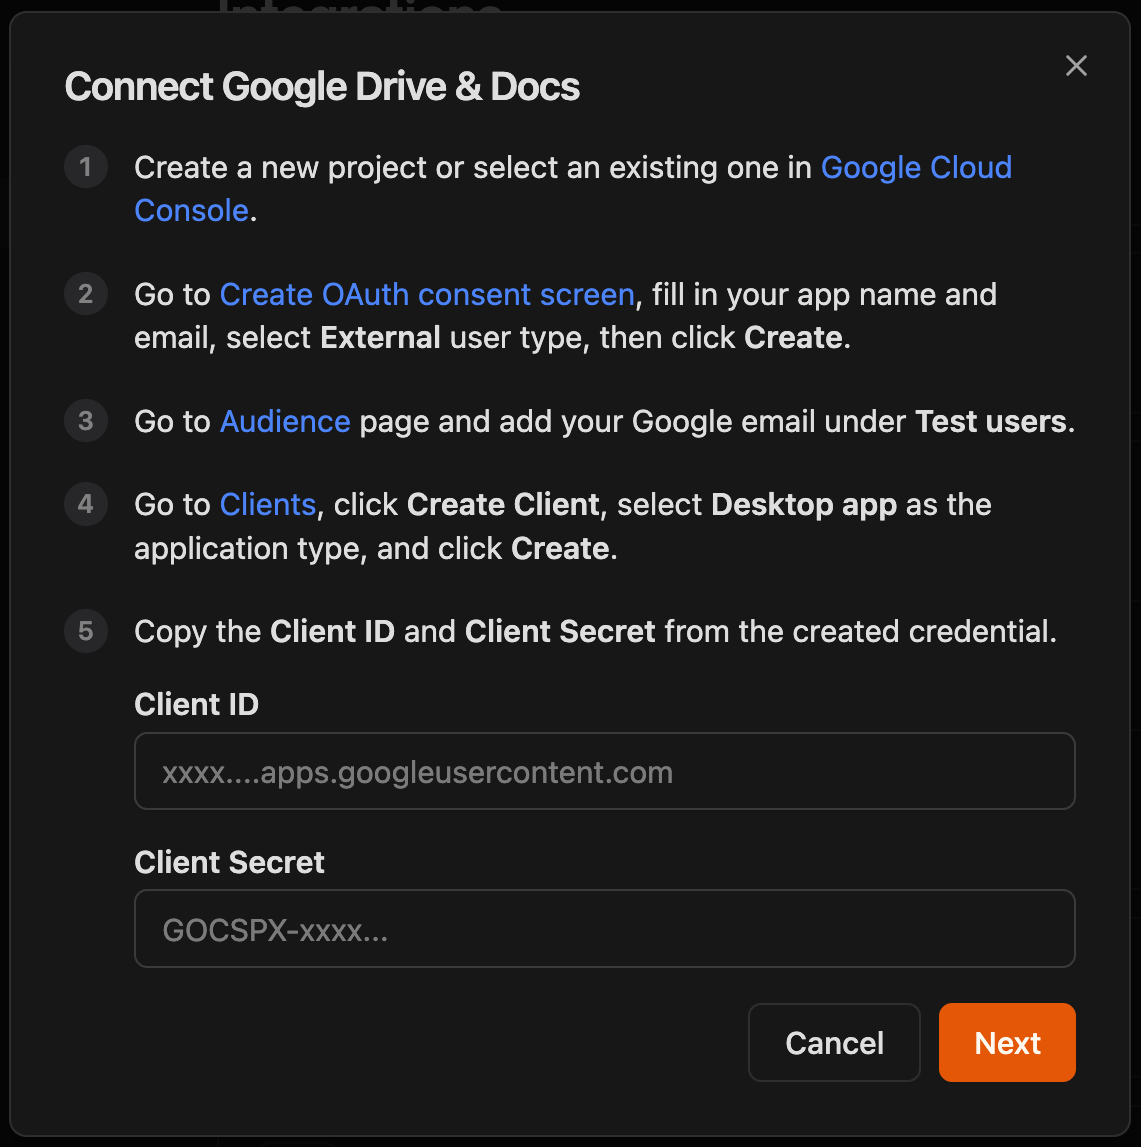
Click **Connect**, paste your **Client ID** and **Client Secret** from OAuth client created above, then click **Next**, enable Google Drive API if haven't done so yet (see Step 2 above) and click **Connect**
Navigate to **Settings → Integrations** in the Zenflow sidebar.
Locate **Google Drive & Docs** in the Integrations Catalog.
Click **Connect**, paste your **Client ID** and **Client Secret** from OAuth client created above, then click **Next**, enable Google Drive API if haven't done so yet (see Step 2 above) and click **Connect**
 You will be redirected to a webpage where you need to select which account you want to connect
 After choosing an account, you'll be redirected to the access authorization screen.
 ## What the Agent Can Do
### Gmail
* **Search** — Find emails by keyword, sender, recipient, date range, or label
* **Read** — Open and read full email threads including attachments
* **Draft** — Compose new emails or replies and save them as drafts for your review before sending
* **Send** — Send emails directly (requires Read & Write permission)
### Google Calendar
* **Read events** — View upcoming meetings, attendees, and event details
* **Check availability** — Find open time slots across your calendar
* **Create events** — Schedule meetings, add attendees, and set locations or video links
* **Set reminders** — Create calendar reminders and recurring events
### Google Drive & Docs
* **Search** — Find files and folders across your Google Drive by name, content, or type
* **Read** — Open and read Google Docs, Sheets, and Slides
* **Create** — Generate new documents, spreadsheets, and presentations
* **Update** — Edit existing documents with new content
* **Organize** — Create folders and move files into structured locations
* **Write reports** — Generate briefs, proposals, summaries, and formatted documents
## Example Use Cases
### Gmail
* Draft follow-up emails to prospects after sales calls
* Scan inbox for customer feedback or churn signals
* Compile weekly digest emails from project updates
* Auto-draft replies to common inquiries
### Google Calendar
* Prepare meeting briefs by pulling context from calendar events
* Schedule follow-up meetings after sales calls
* Create onboarding calendar events for new hires
* Coordinate content publishing schedules
### Google Drive & Docs
* Compile weekly executive briefs from multiple data sources into a Google Doc
* Create proposal drafts from email threads and save to a shared Drive folder
* Build expense reports by extracting data from Gmail receipts into Sheets
* Organize meeting notes into structured folders by team and date
Browse ready-to-use templates in the **[Zencoder Marketplace](https://zencoder.ai/marketplace)**.
## What the Agent Can Do
### Gmail
* **Search** — Find emails by keyword, sender, recipient, date range, or label
* **Read** — Open and read full email threads including attachments
* **Draft** — Compose new emails or replies and save them as drafts for your review before sending
* **Send** — Send emails directly (requires Read & Write permission)
### Google Calendar
* **Read events** — View upcoming meetings, attendees, and event details
* **Check availability** — Find open time slots across your calendar
* **Create events** — Schedule meetings, add attendees, and set locations or video links
* **Set reminders** — Create calendar reminders and recurring events
### Google Drive & Docs
* **Search** — Find files and folders across your Google Drive by name, content, or type
* **Read** — Open and read Google Docs, Sheets, and Slides
* **Create** — Generate new documents, spreadsheets, and presentations
* **Update** — Edit existing documents with new content
* **Organize** — Create folders and move files into structured locations
* **Write reports** — Generate briefs, proposals, summaries, and formatted documents
## Example Use Cases
### Gmail
* Draft follow-up emails to prospects after sales calls
* Scan inbox for customer feedback or churn signals
* Compile weekly digest emails from project updates
* Auto-draft replies to common inquiries
### Google Calendar
* Prepare meeting briefs by pulling context from calendar events
* Schedule follow-up meetings after sales calls
* Create onboarding calendar events for new hires
* Coordinate content publishing schedules
### Google Drive & Docs
* Compile weekly executive briefs from multiple data sources into a Google Doc
* Create proposal drafts from email threads and save to a shared Drive folder
* Build expense reports by extracting data from Gmail receipts into Sheets
* Organize meeting notes into structured folders by team and date
Browse ready-to-use templates in the **[Zencoder Marketplace](https://zencoder.ai/marketplace)**.