> ## Documentation Index
> Fetch the complete documentation index at: https://docs.zencoder.ai/llms.txt
> Use this file to discover all available pages before exploring further.
# Jira Integration
> Connect Zenflow Work to Jira for issue tracking and task synchronization.
This native integration requires a Zencoder account.
## Overview
Zenflow integrates with Jira to sync tasks and issues between both platforms. Create Zenflow tasks from Jira tickets, push status updates back, and keep your project management in sync with AI-driven development work.
## Connecting to Jira
Navigate to **Settings → Integrations** in the Zenflow sidebar.
Locate **Jira** in the Integrations Catalog.
Click the **Connect** or **\[+]** button on the Jira card.
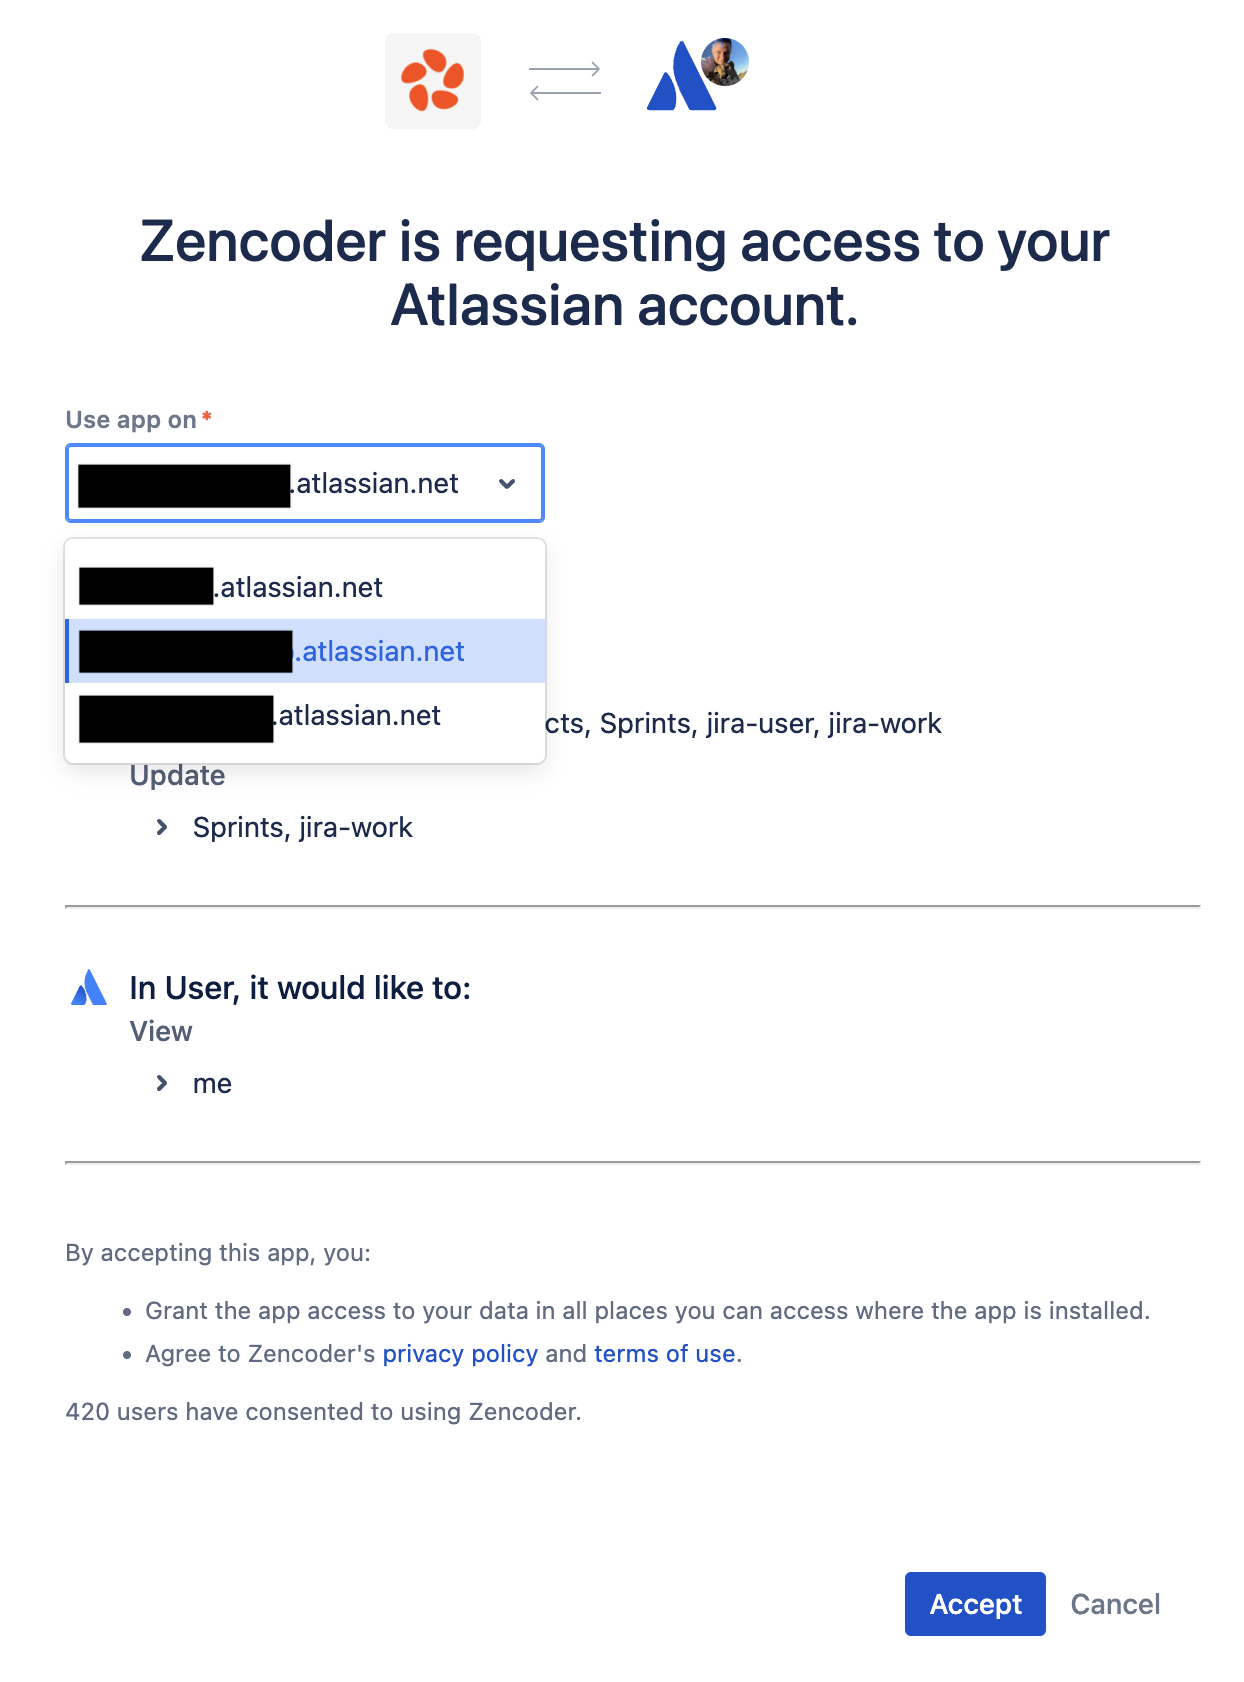
Authenticate and authorize Zenflow to access your Jira workspace via the secure OAuth popup window:
Select the space you want to authorize the app in, click **Accept**
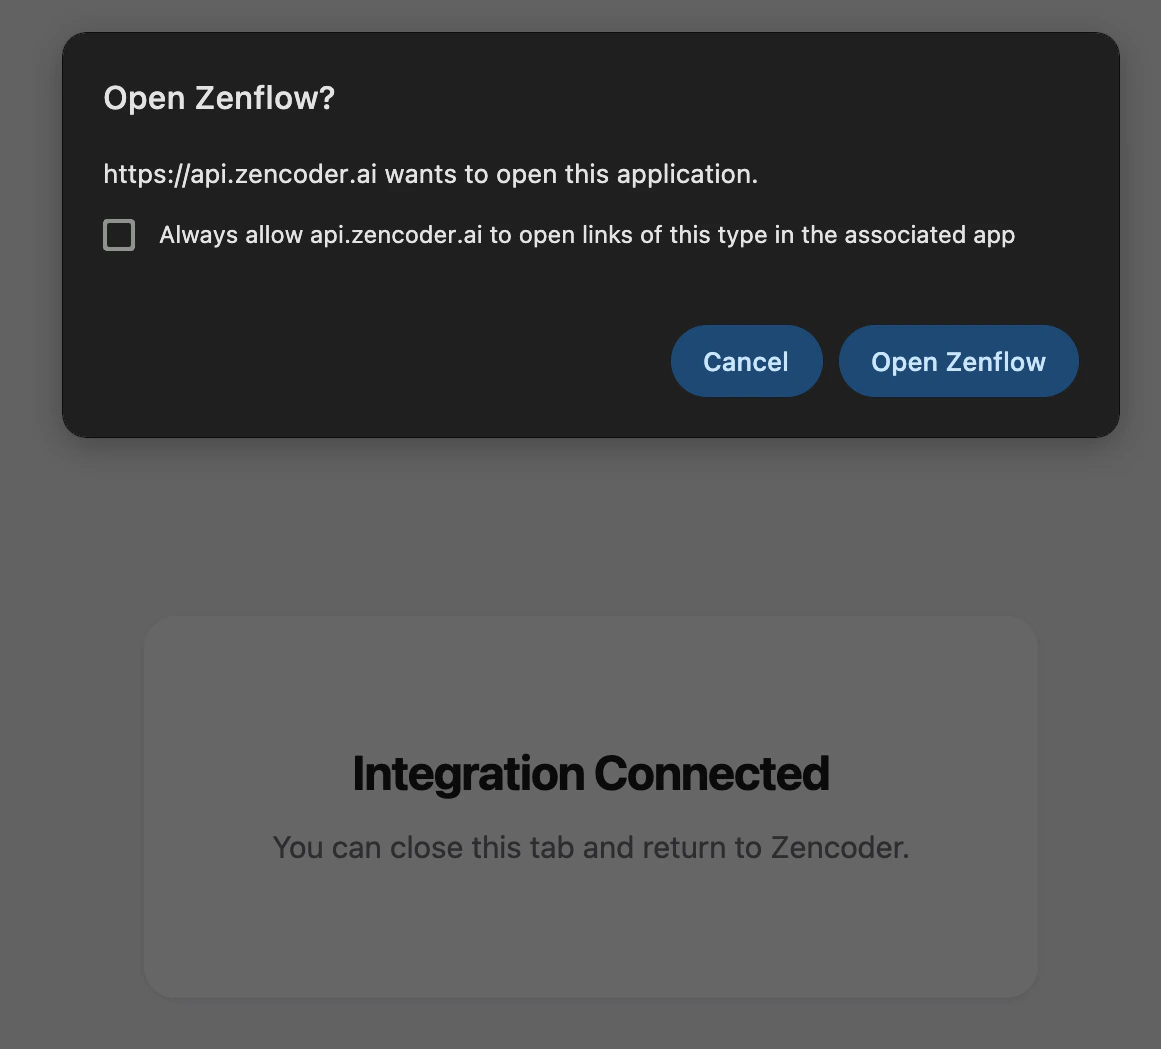
 You should get a modal asking if you want to open Zenflow, click **Open Zenflow**
 ## Features
### Create Tasks from Jira Tickets
Pull Jira issues directly into Zenflow as tasks:
1. Open the task creation dialog
2. Select **Import from Jira**
3. Choose the ticket to work on
4. Zenflow creates a task with the ticket context pre-filled
### Status Sync
Zenflow syncs task status back to Jira:
| Zenflow Status | Jira Status |
| -------------- | ----------- |
| Running | In Progress |
| Review | In Review |
| Completed | Done |
### Branch and PR Linking
When a task creates a branch or PR, Zenflow attaches the link to the corresponding Jira ticket for traceability.
## Next Steps
Connect to GitHub for PRs
Add more tool integrations
## Features
### Create Tasks from Jira Tickets
Pull Jira issues directly into Zenflow as tasks:
1. Open the task creation dialog
2. Select **Import from Jira**
3. Choose the ticket to work on
4. Zenflow creates a task with the ticket context pre-filled
### Status Sync
Zenflow syncs task status back to Jira:
| Zenflow Status | Jira Status |
| -------------- | ----------- |
| Running | In Progress |
| Review | In Review |
| Completed | Done |
### Branch and PR Linking
When a task creates a branch or PR, Zenflow attaches the link to the corresponding Jira ticket for traceability.
## Next Steps
Connect to GitHub for PRs
Add more tool integrations